DIY Wedding Card Frame Design
Last weekend, I took a little bit of time for myself; got off my phone and computer and crafted. I can’t tell you the last time I crafted without a…purpose, I guess you would say? I mean I do a lot of crafts for others, and did stuff for my wedding, but this was the first time I did it just for me and for fun. And it was really, really nice! I forgot how much I loved doing small little projects like that.
I shared a lot on my Instagram story and got tons of messages asking about it, so I decided to share it on this weeks blog!
If you’ve recently, or even not recently, gotten married, or maybe you like to keep birthday cards or christmas cards or all cards, basically, if you keep sentimental cards of any kind, you probably have the same question as me- what do you do with them? Do you just keep them in a box to wait until the next time you open them in 5 years? Do you display these huge honkin’ cards somewhere for everyone to see and for them to take up tons of space? I had mine sitting in a bag and box for the longest time.
While in the midst of wedding planning and researching on Pinterest I came across this idea. I can’t take it as my own, although I’m not sure who did it or where I saw it, I just have a random photo screenshotted on my phone, but it’s cutting your cards into tiles and arranging them into a frame.
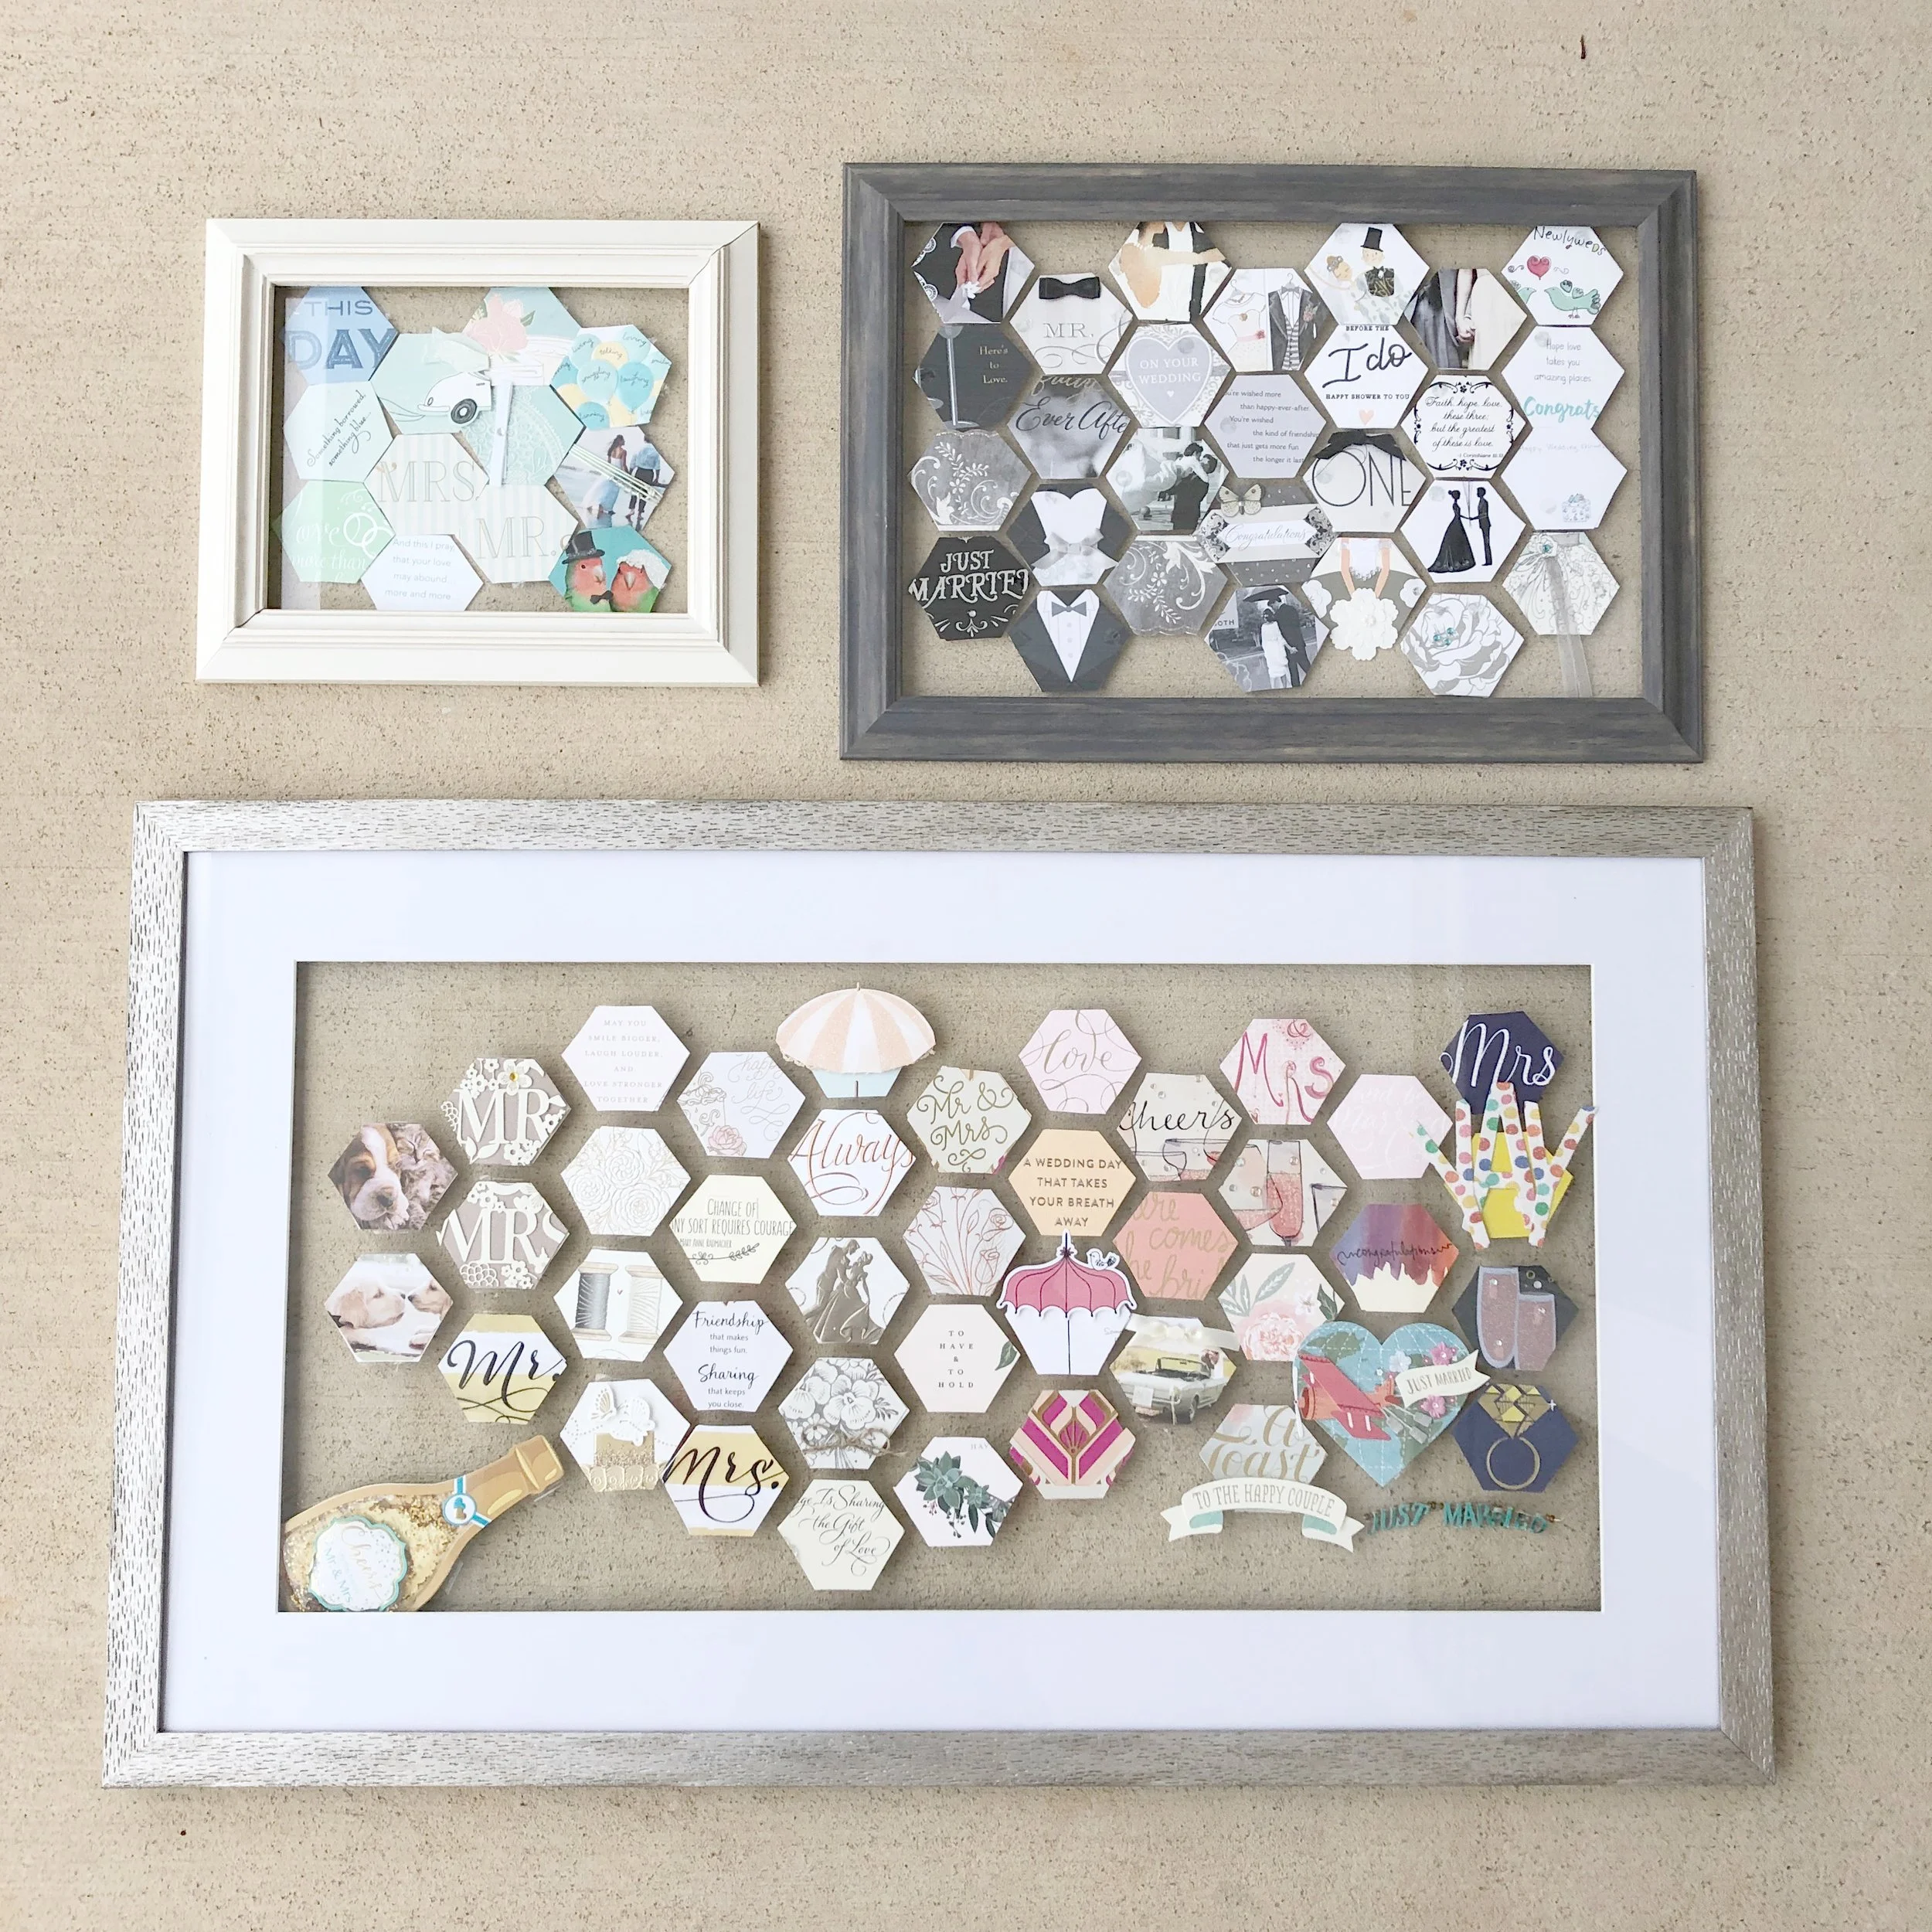
So that’s what I did! And even though I can’t hang them quite yet, I just LOVE how they turned out. So here’s today’s little tutorial.
Because of what I do for a living, I already had all of the pieces I needed. I get all my crafting supplies at Hobby Lobby usually, but in case you don’t have time to go there, I’ve most of the items to Amazon. The frame is hard because you’ll have to measure and figure out what fits in your home.
Please note that I wasn’t doing this thinking I would be blogging, so some of the photos aren’t the best. I was just doing this for me and I got so many messages about it I wanted to share! And there are probably a lot of other ways to get the same result that I did, but I am not a craft expert, so this is what I had and how I did it.
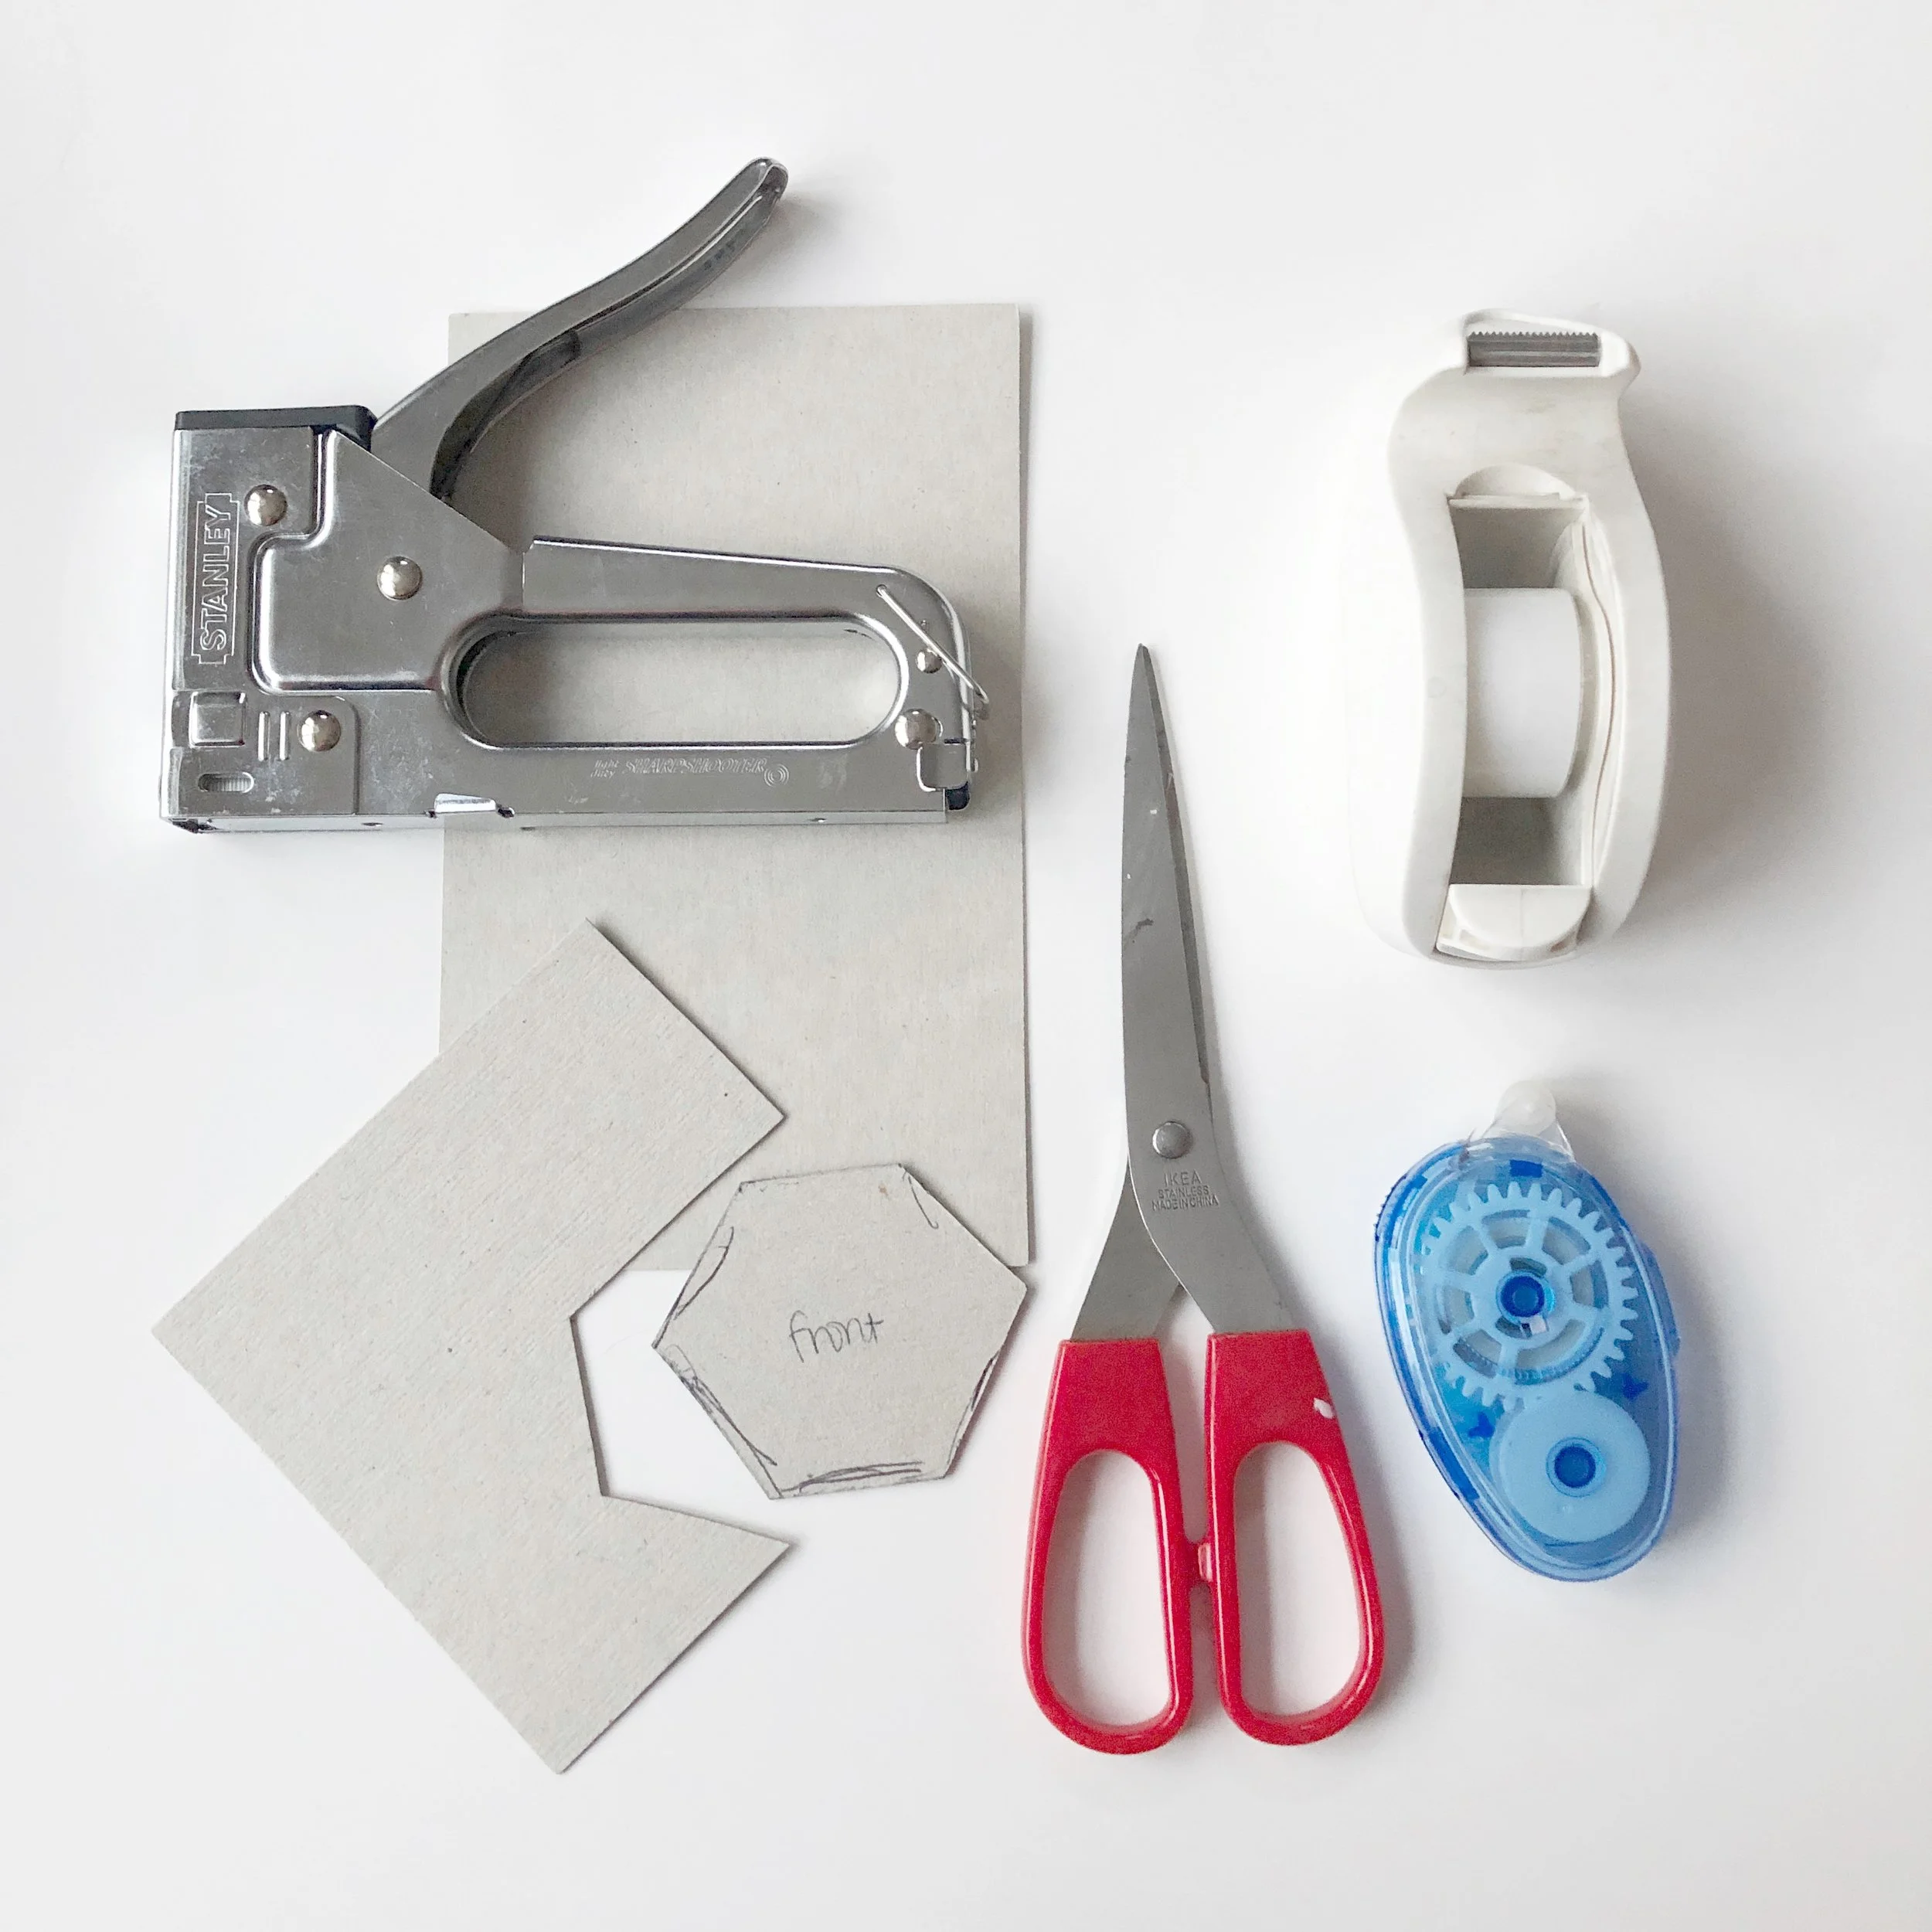
What you’ll need:
Scissors
Small piece of Cardboard; at least 2 inches by 2 inches
Glue Stick, Rubber Cement or Crafters Tape (I used Crafters Tape)
Shadow Box or Frame (I went with frame, but waited until after Step 5 to choose)
Clear Tape (has to be clear/see-thru)
Staple Gun (For placing glass in frame if you’re not putting a back on it.
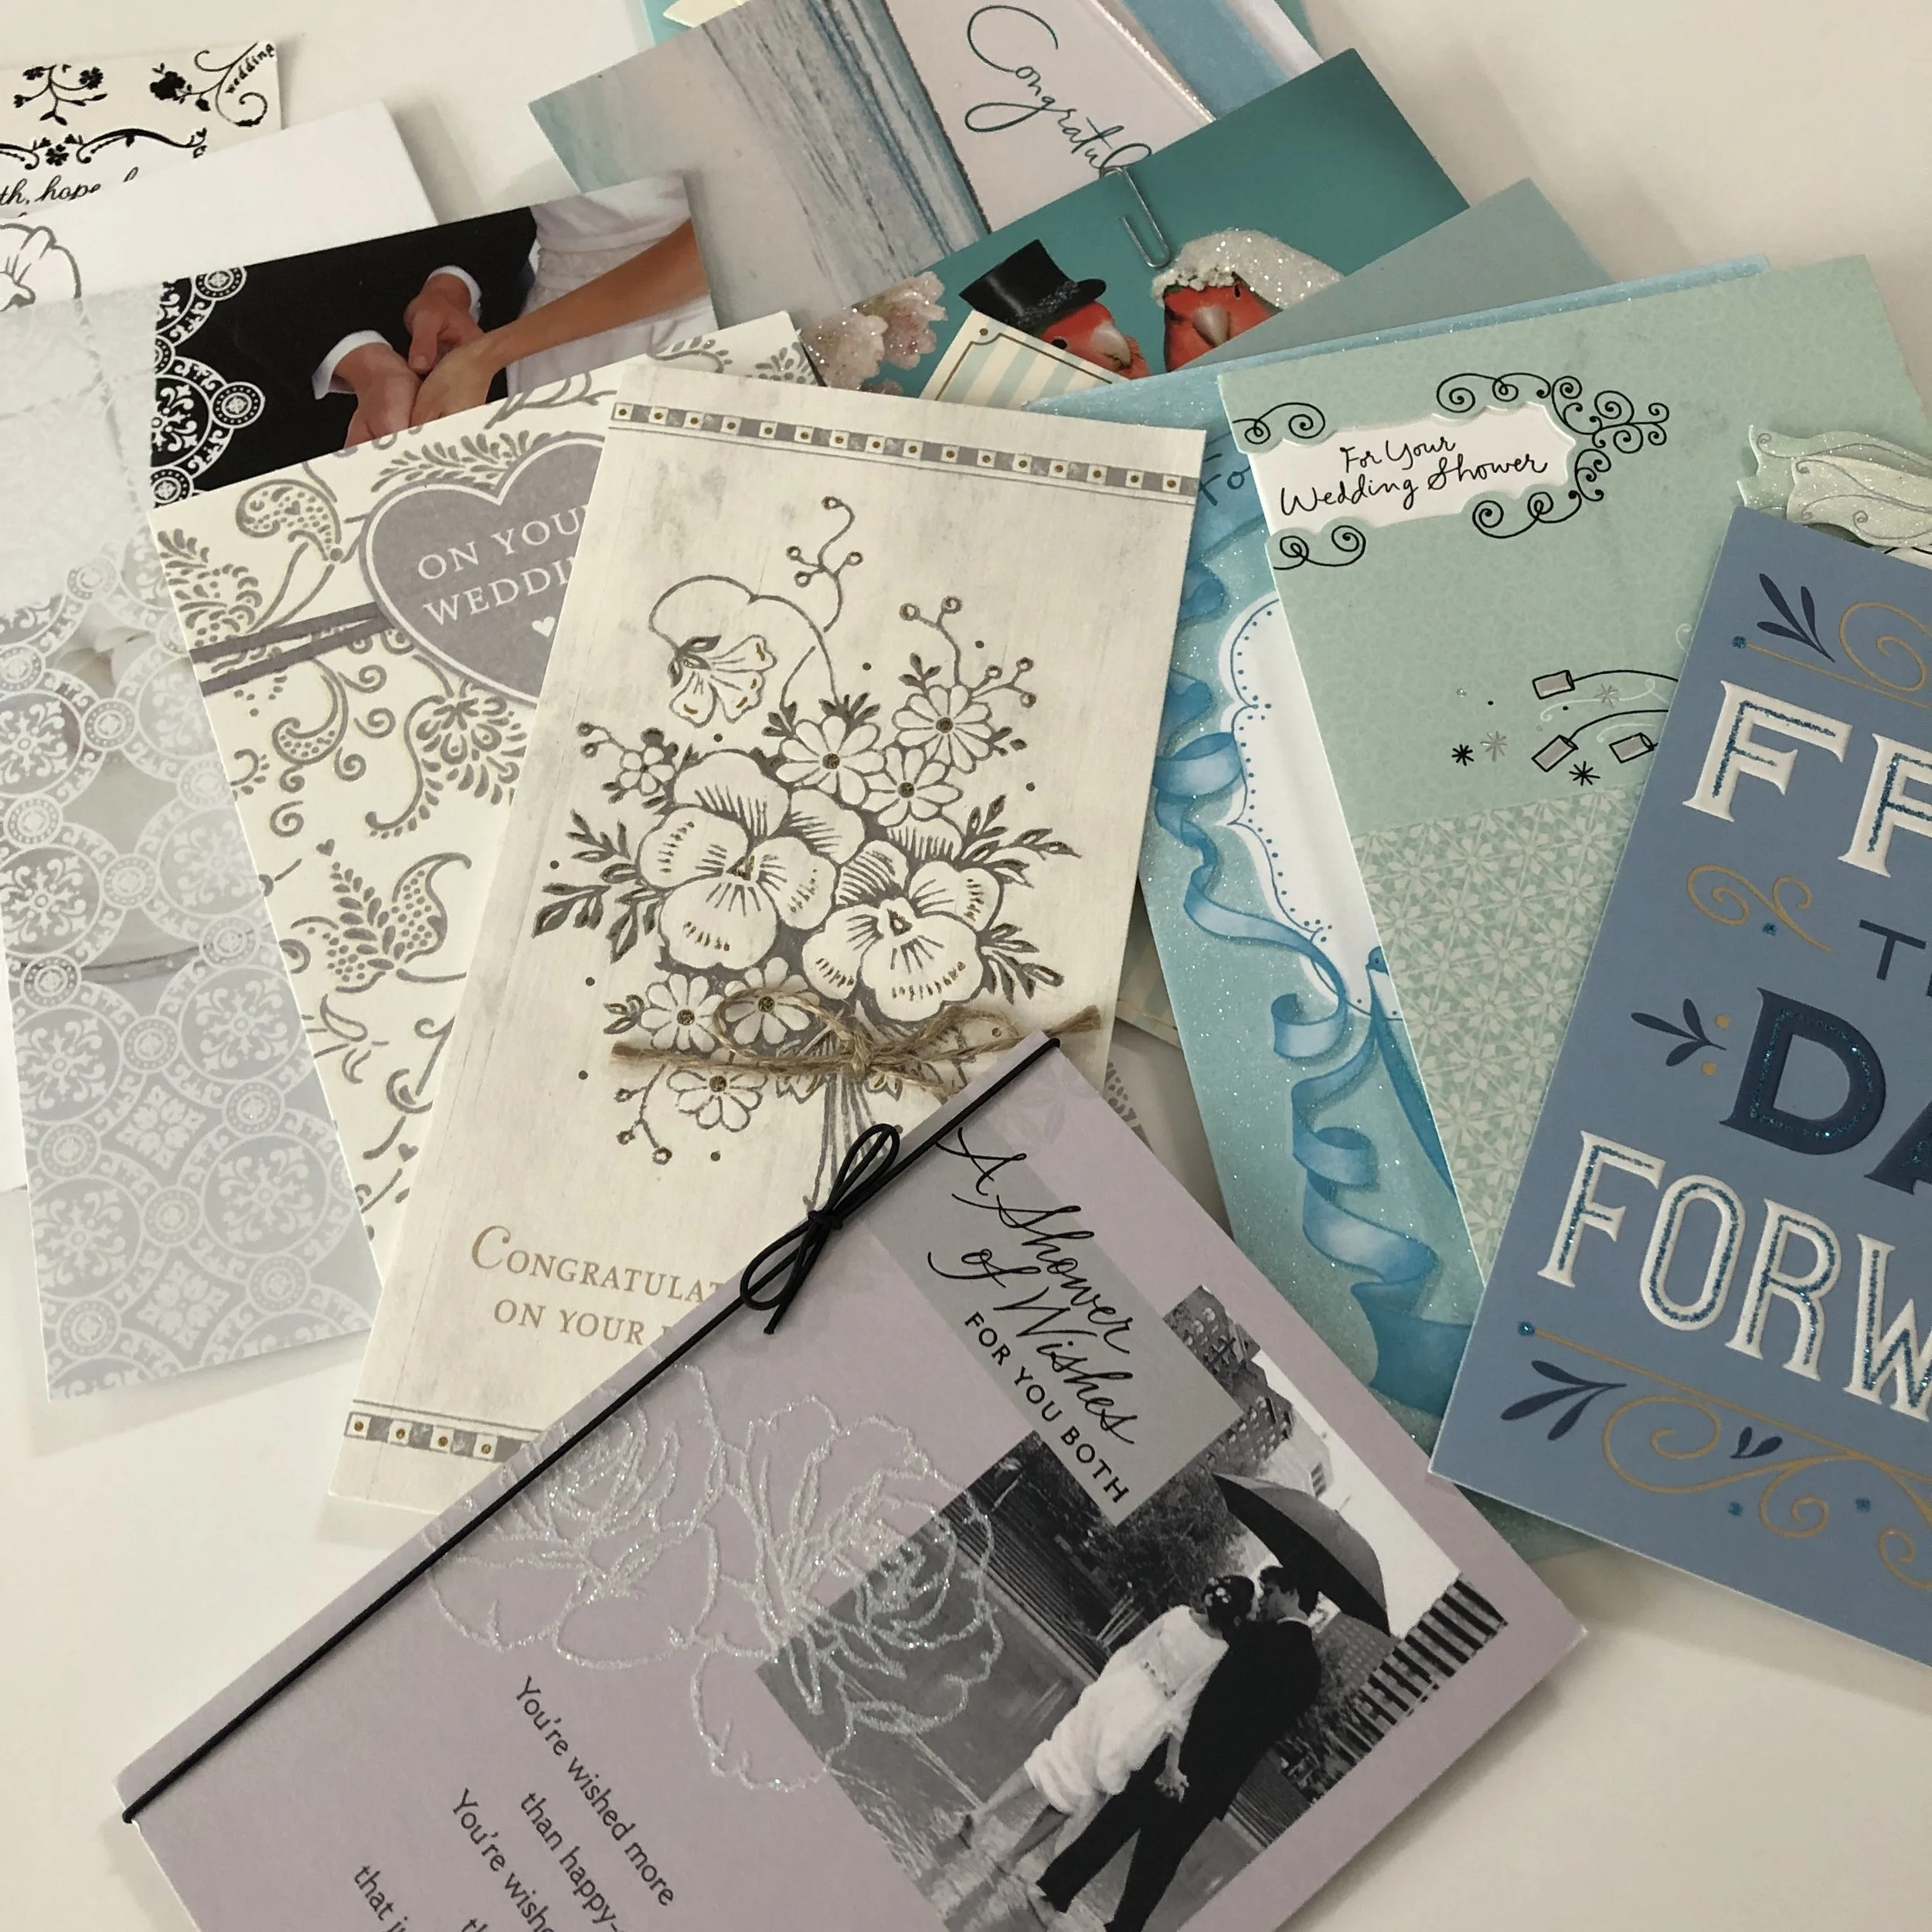
STEP 1: Gather all of the cards you want to include. I used all of my bridal shower, bachelorette and wedding cards, but if you’re a keeper of things, you could also do birthday cards, anniversary cards, friendship cards, whatever cards you want!
STEP 2: Decide on what shape you want your tiles to be; just make sure it’s symmetrical and easily fits together. I chose a Hexagon, but you could do squares or rectangles. You could also do circles, but they won’t fit together quite as nicely. Then make a cardboard tile of that shape the size you want it. I did mine about 2 inches by 2 inches, and that made for a big enough size to use for most cards, but not too big.
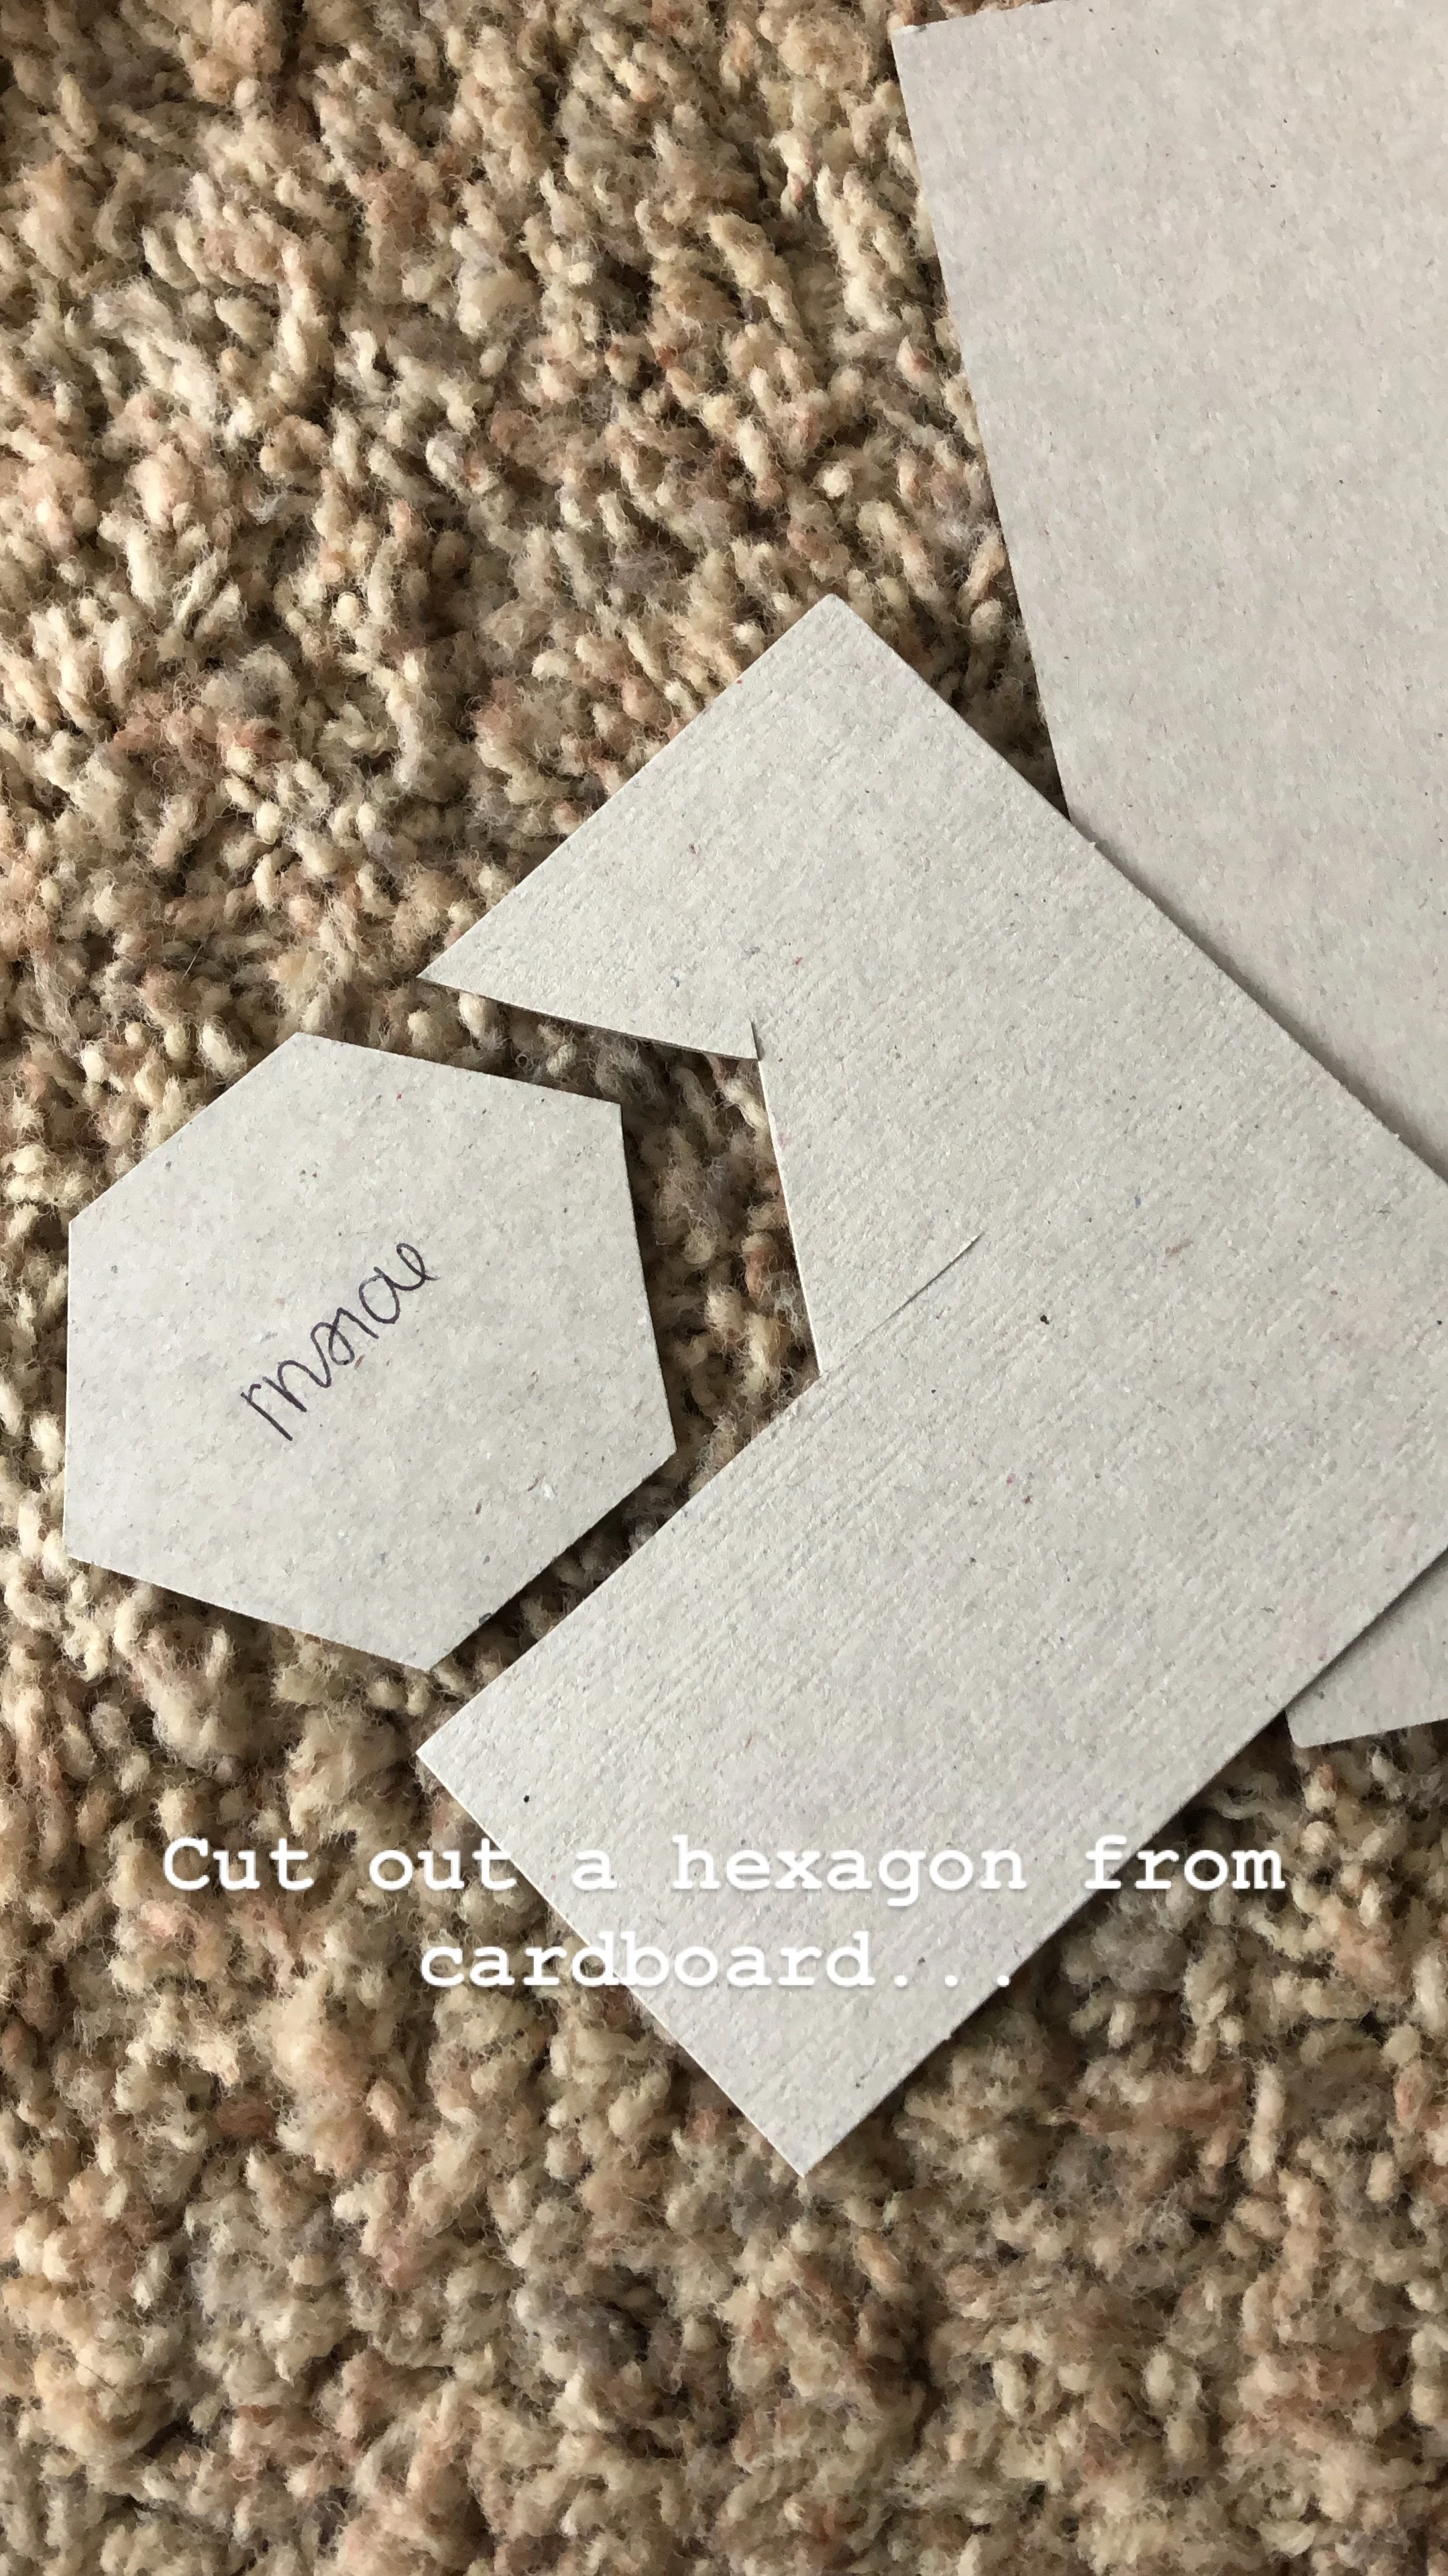
I printed my shape off on regular computer paper, cut it out and then traced it onto the cardboard rather than measure or eyeball it.
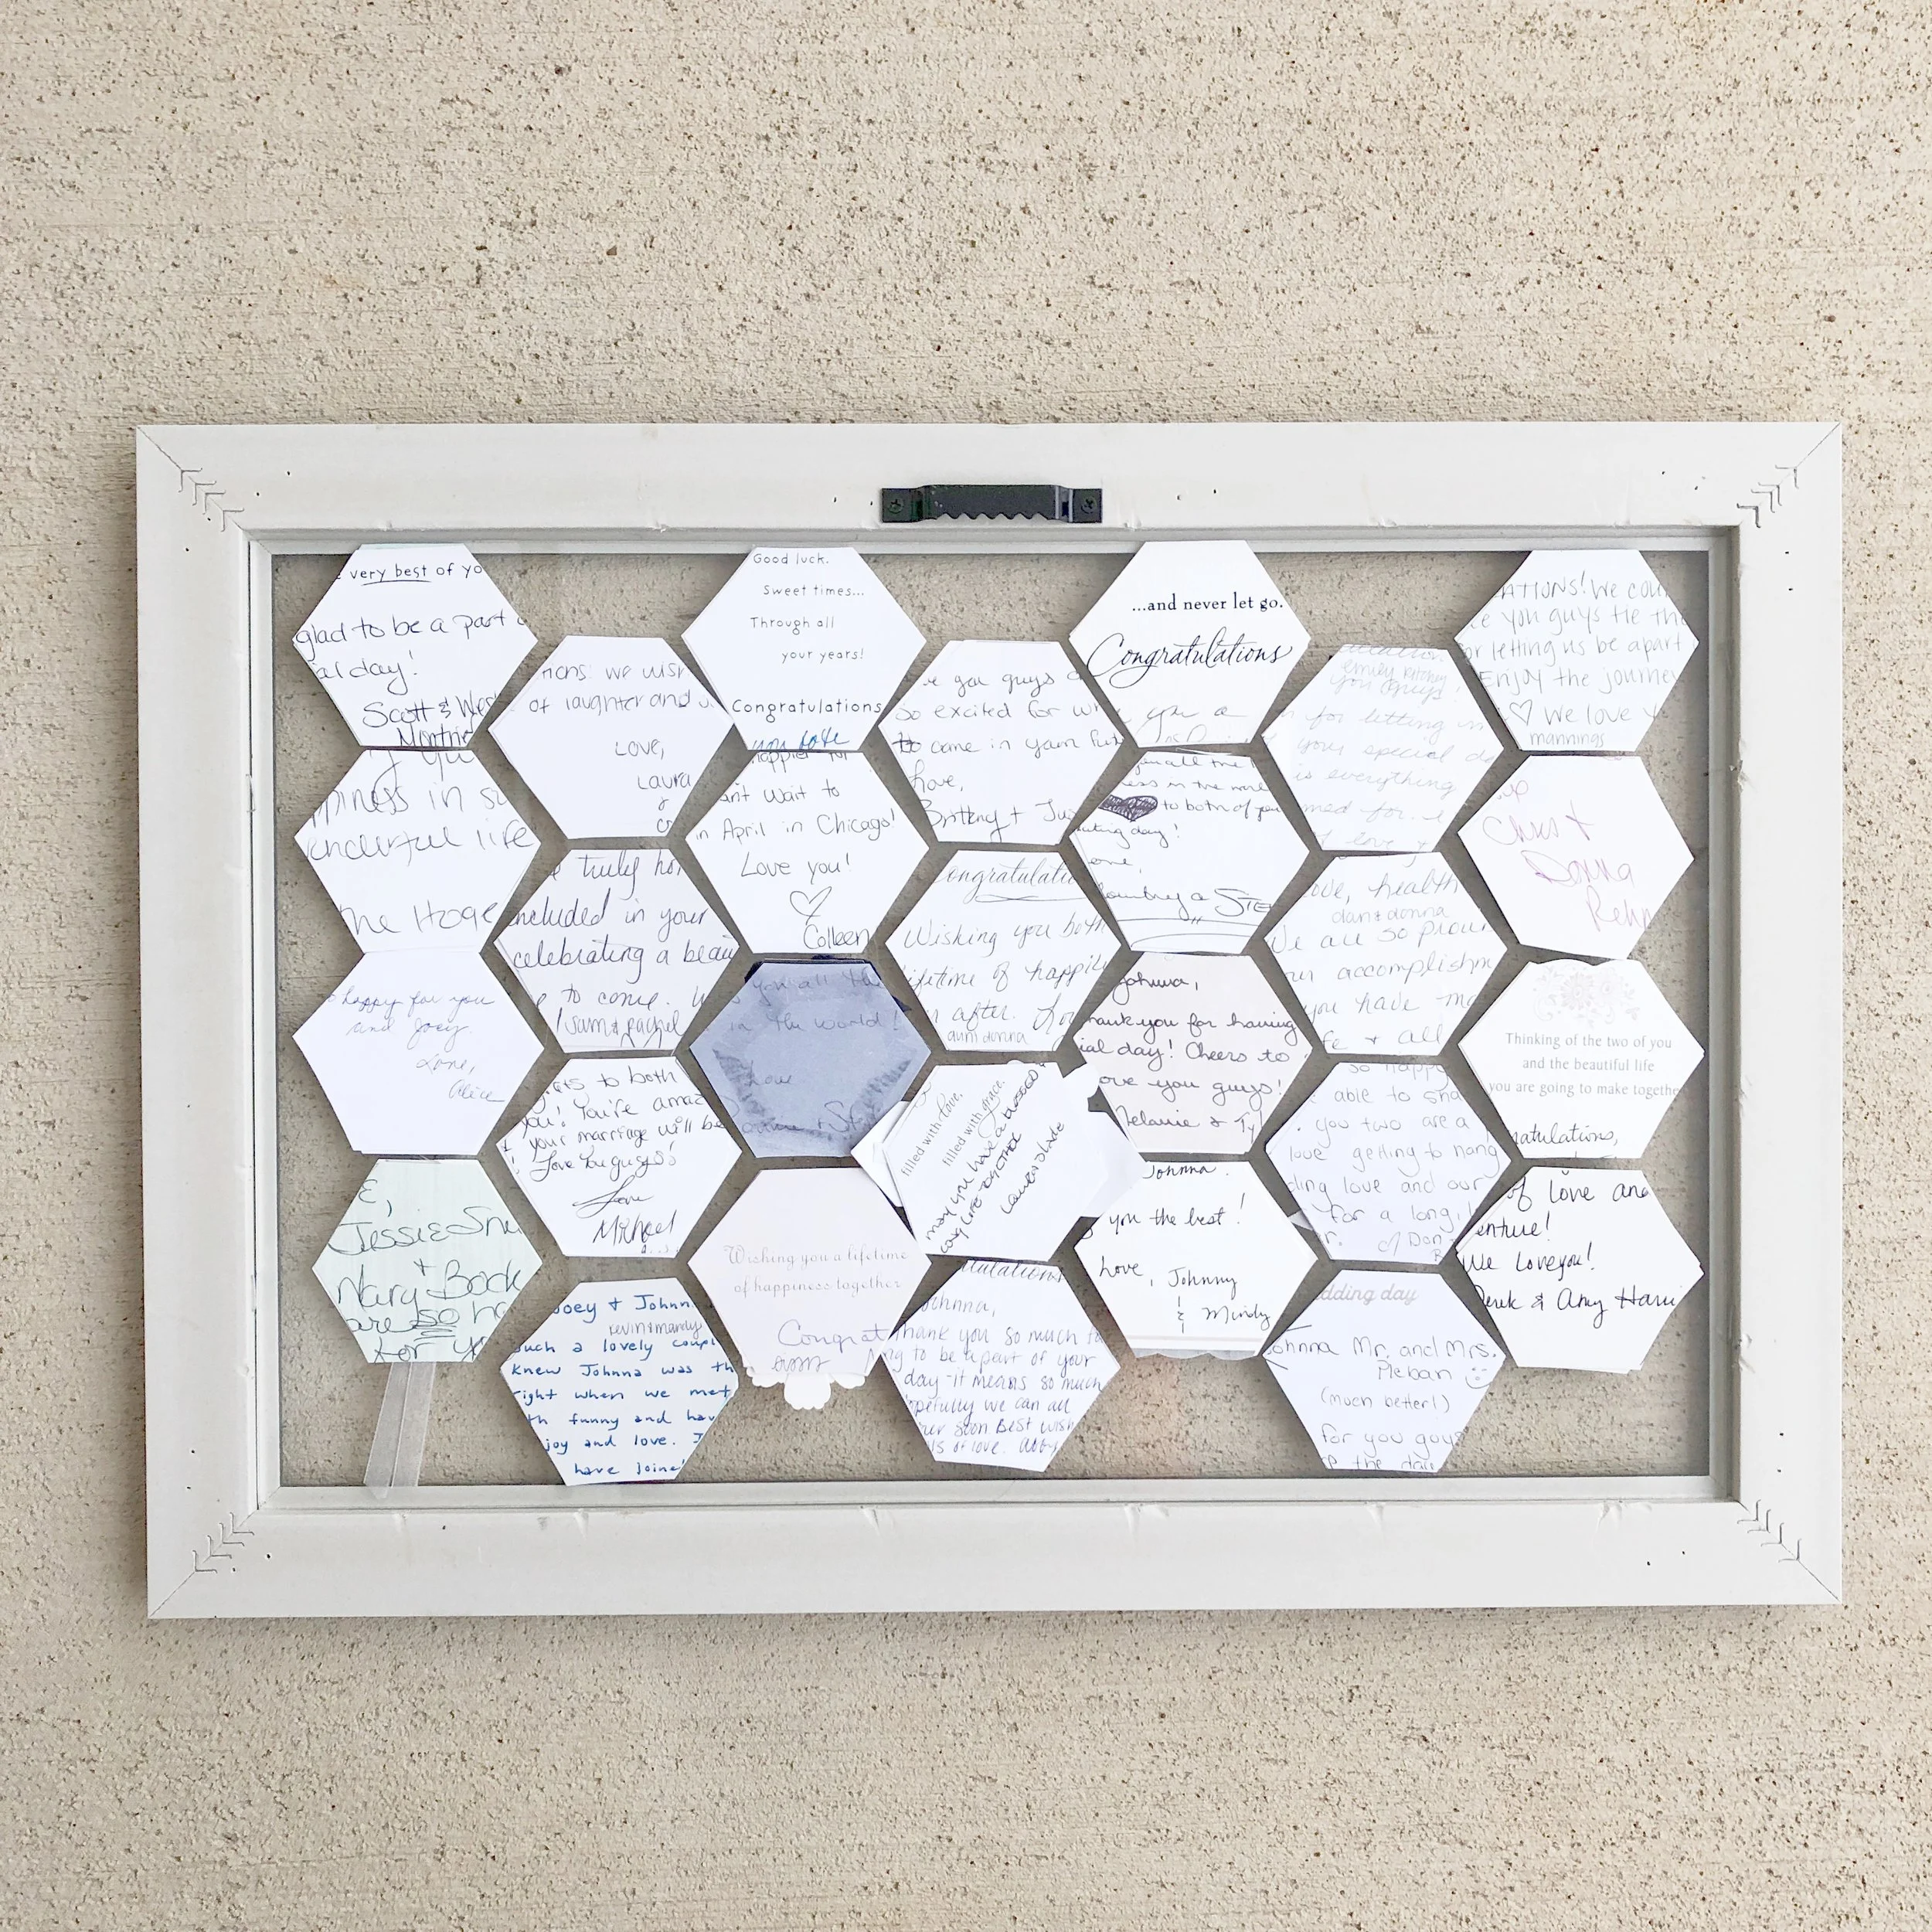
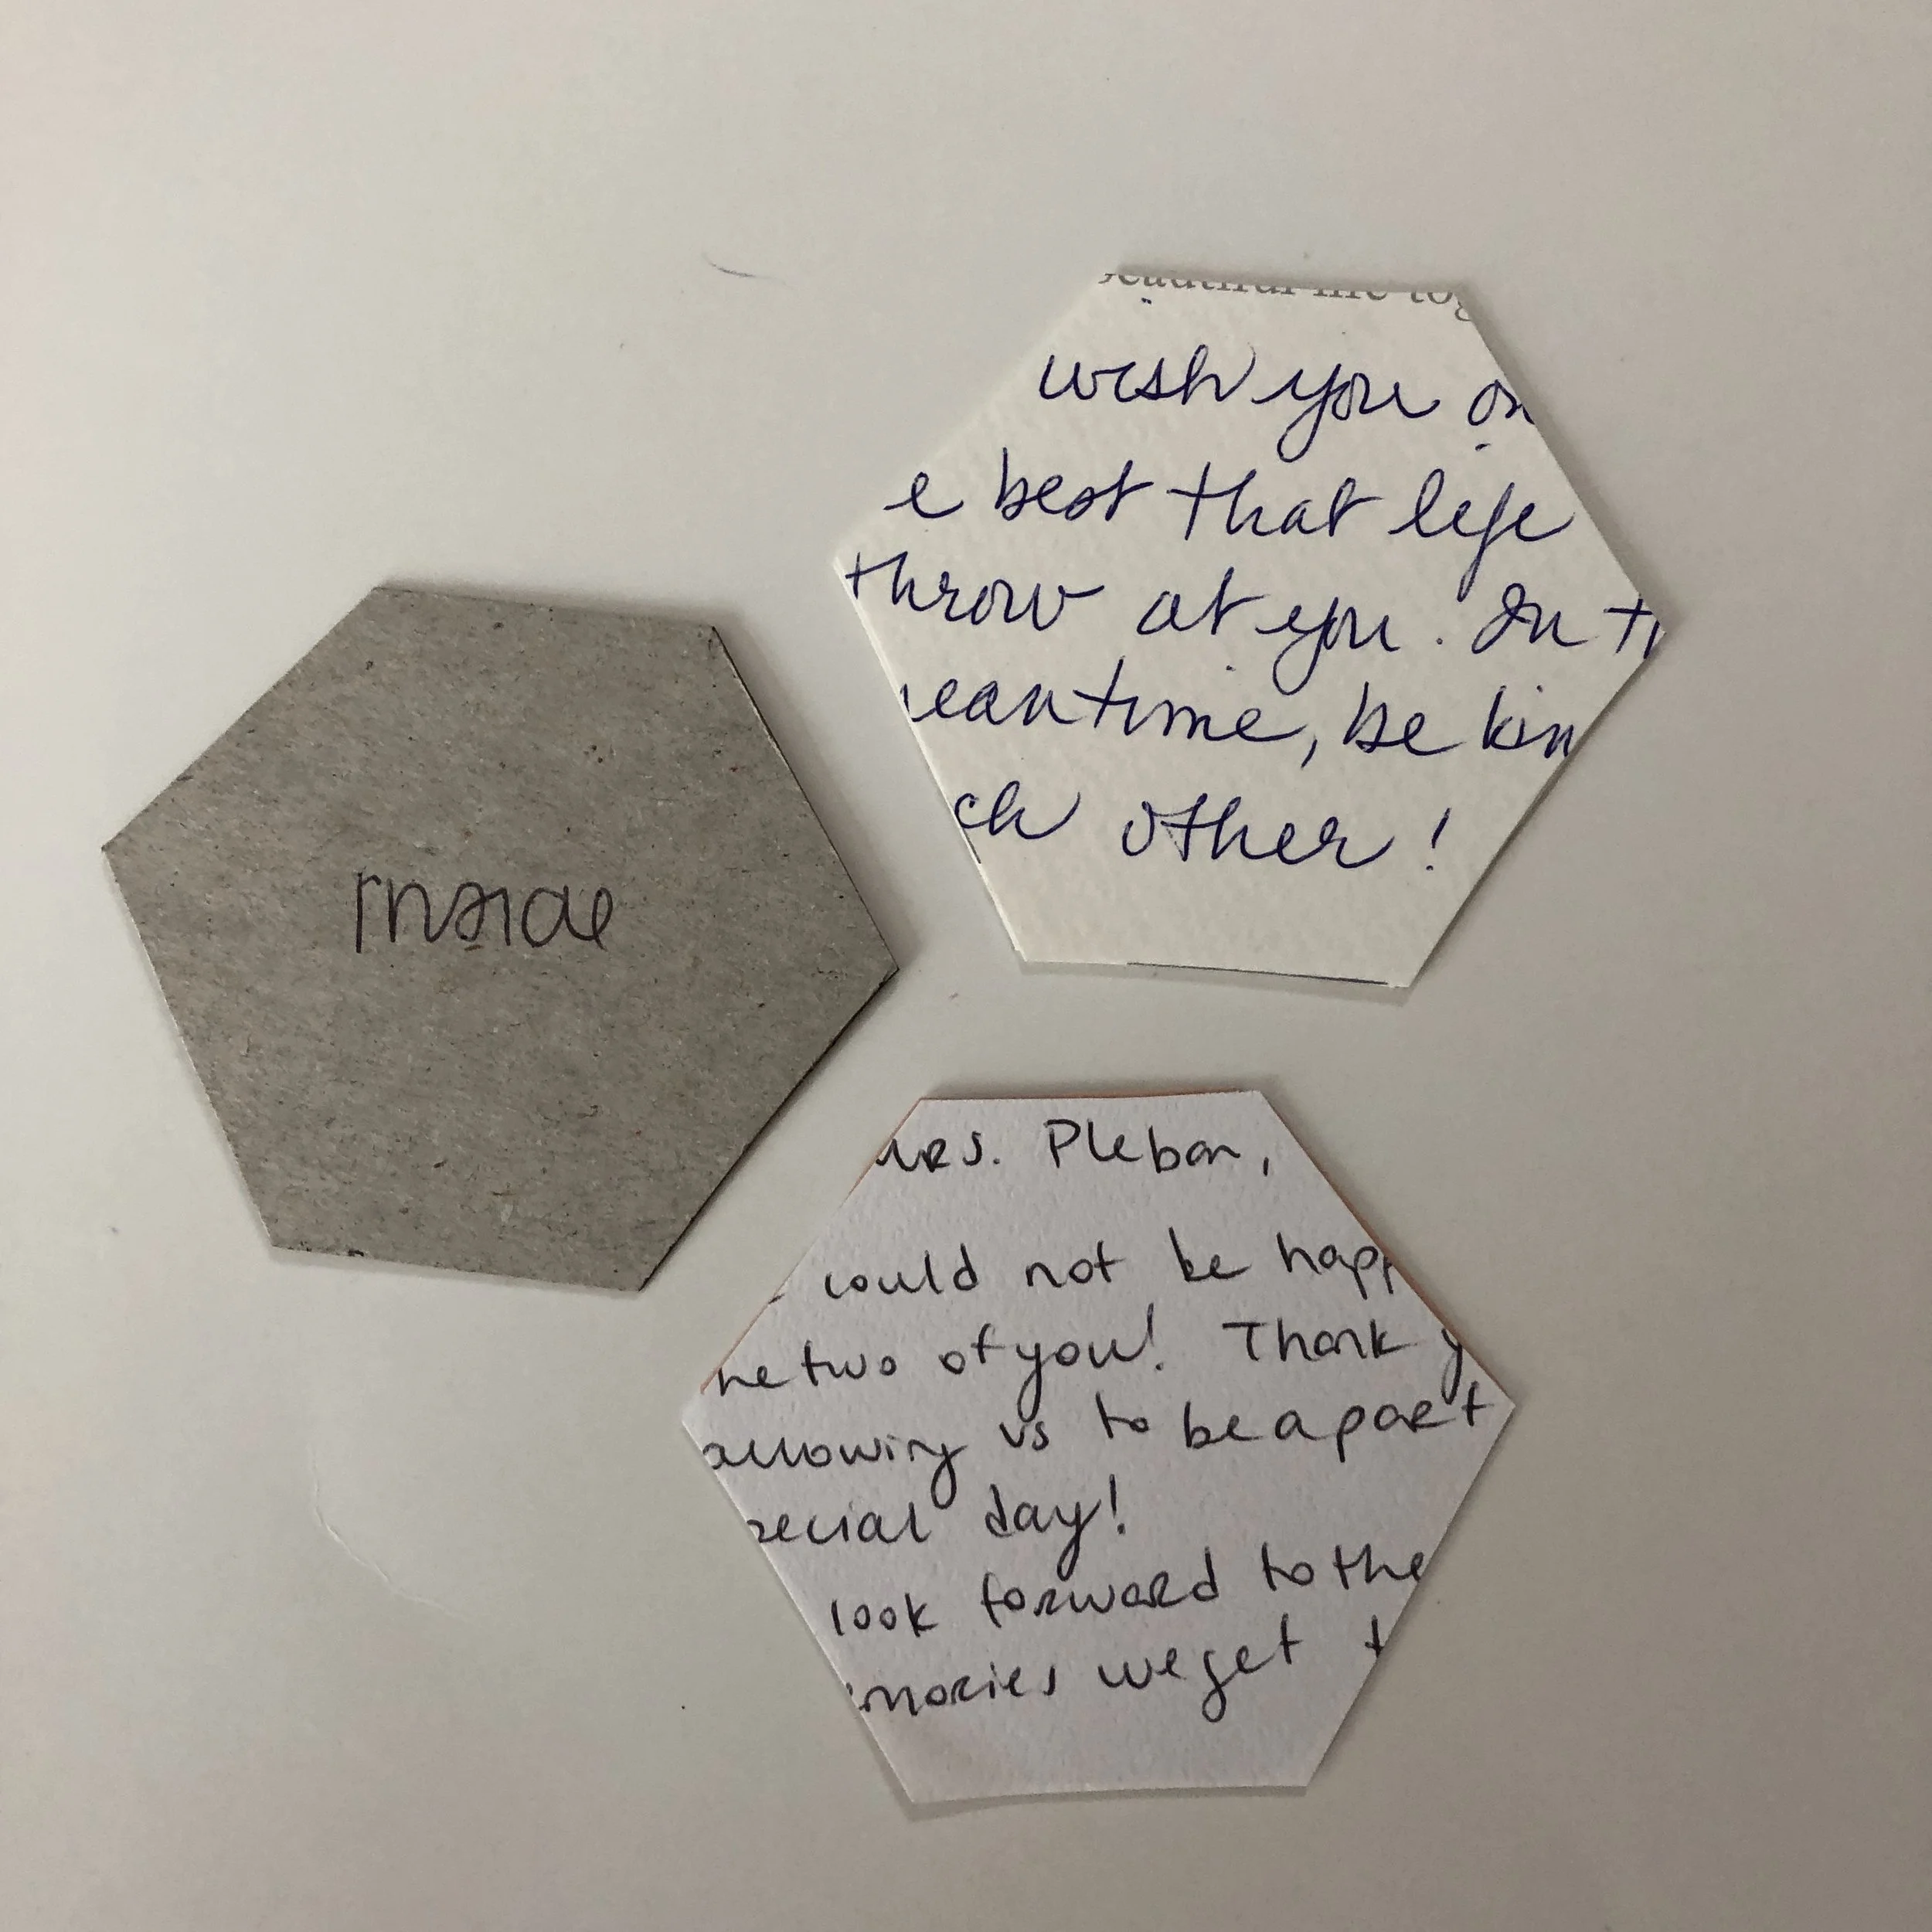
STEP 3: Trace the shapes on the front of the cards over the part you want to be included in the collage. I also traced on the inside of the where guests wrote a message. The pieces don’t necessarily cover everything guests wrote and cut off some parts of what is written, but you can get the gist of what it says. Any cards that had super long messages or something more sentimental, I didn’t end up cutting. So I did save about 5 or 6.

*Side note: if the names of the guest didn’t make it onto the back of the card, I wrote in their names so I knew who wrote it.
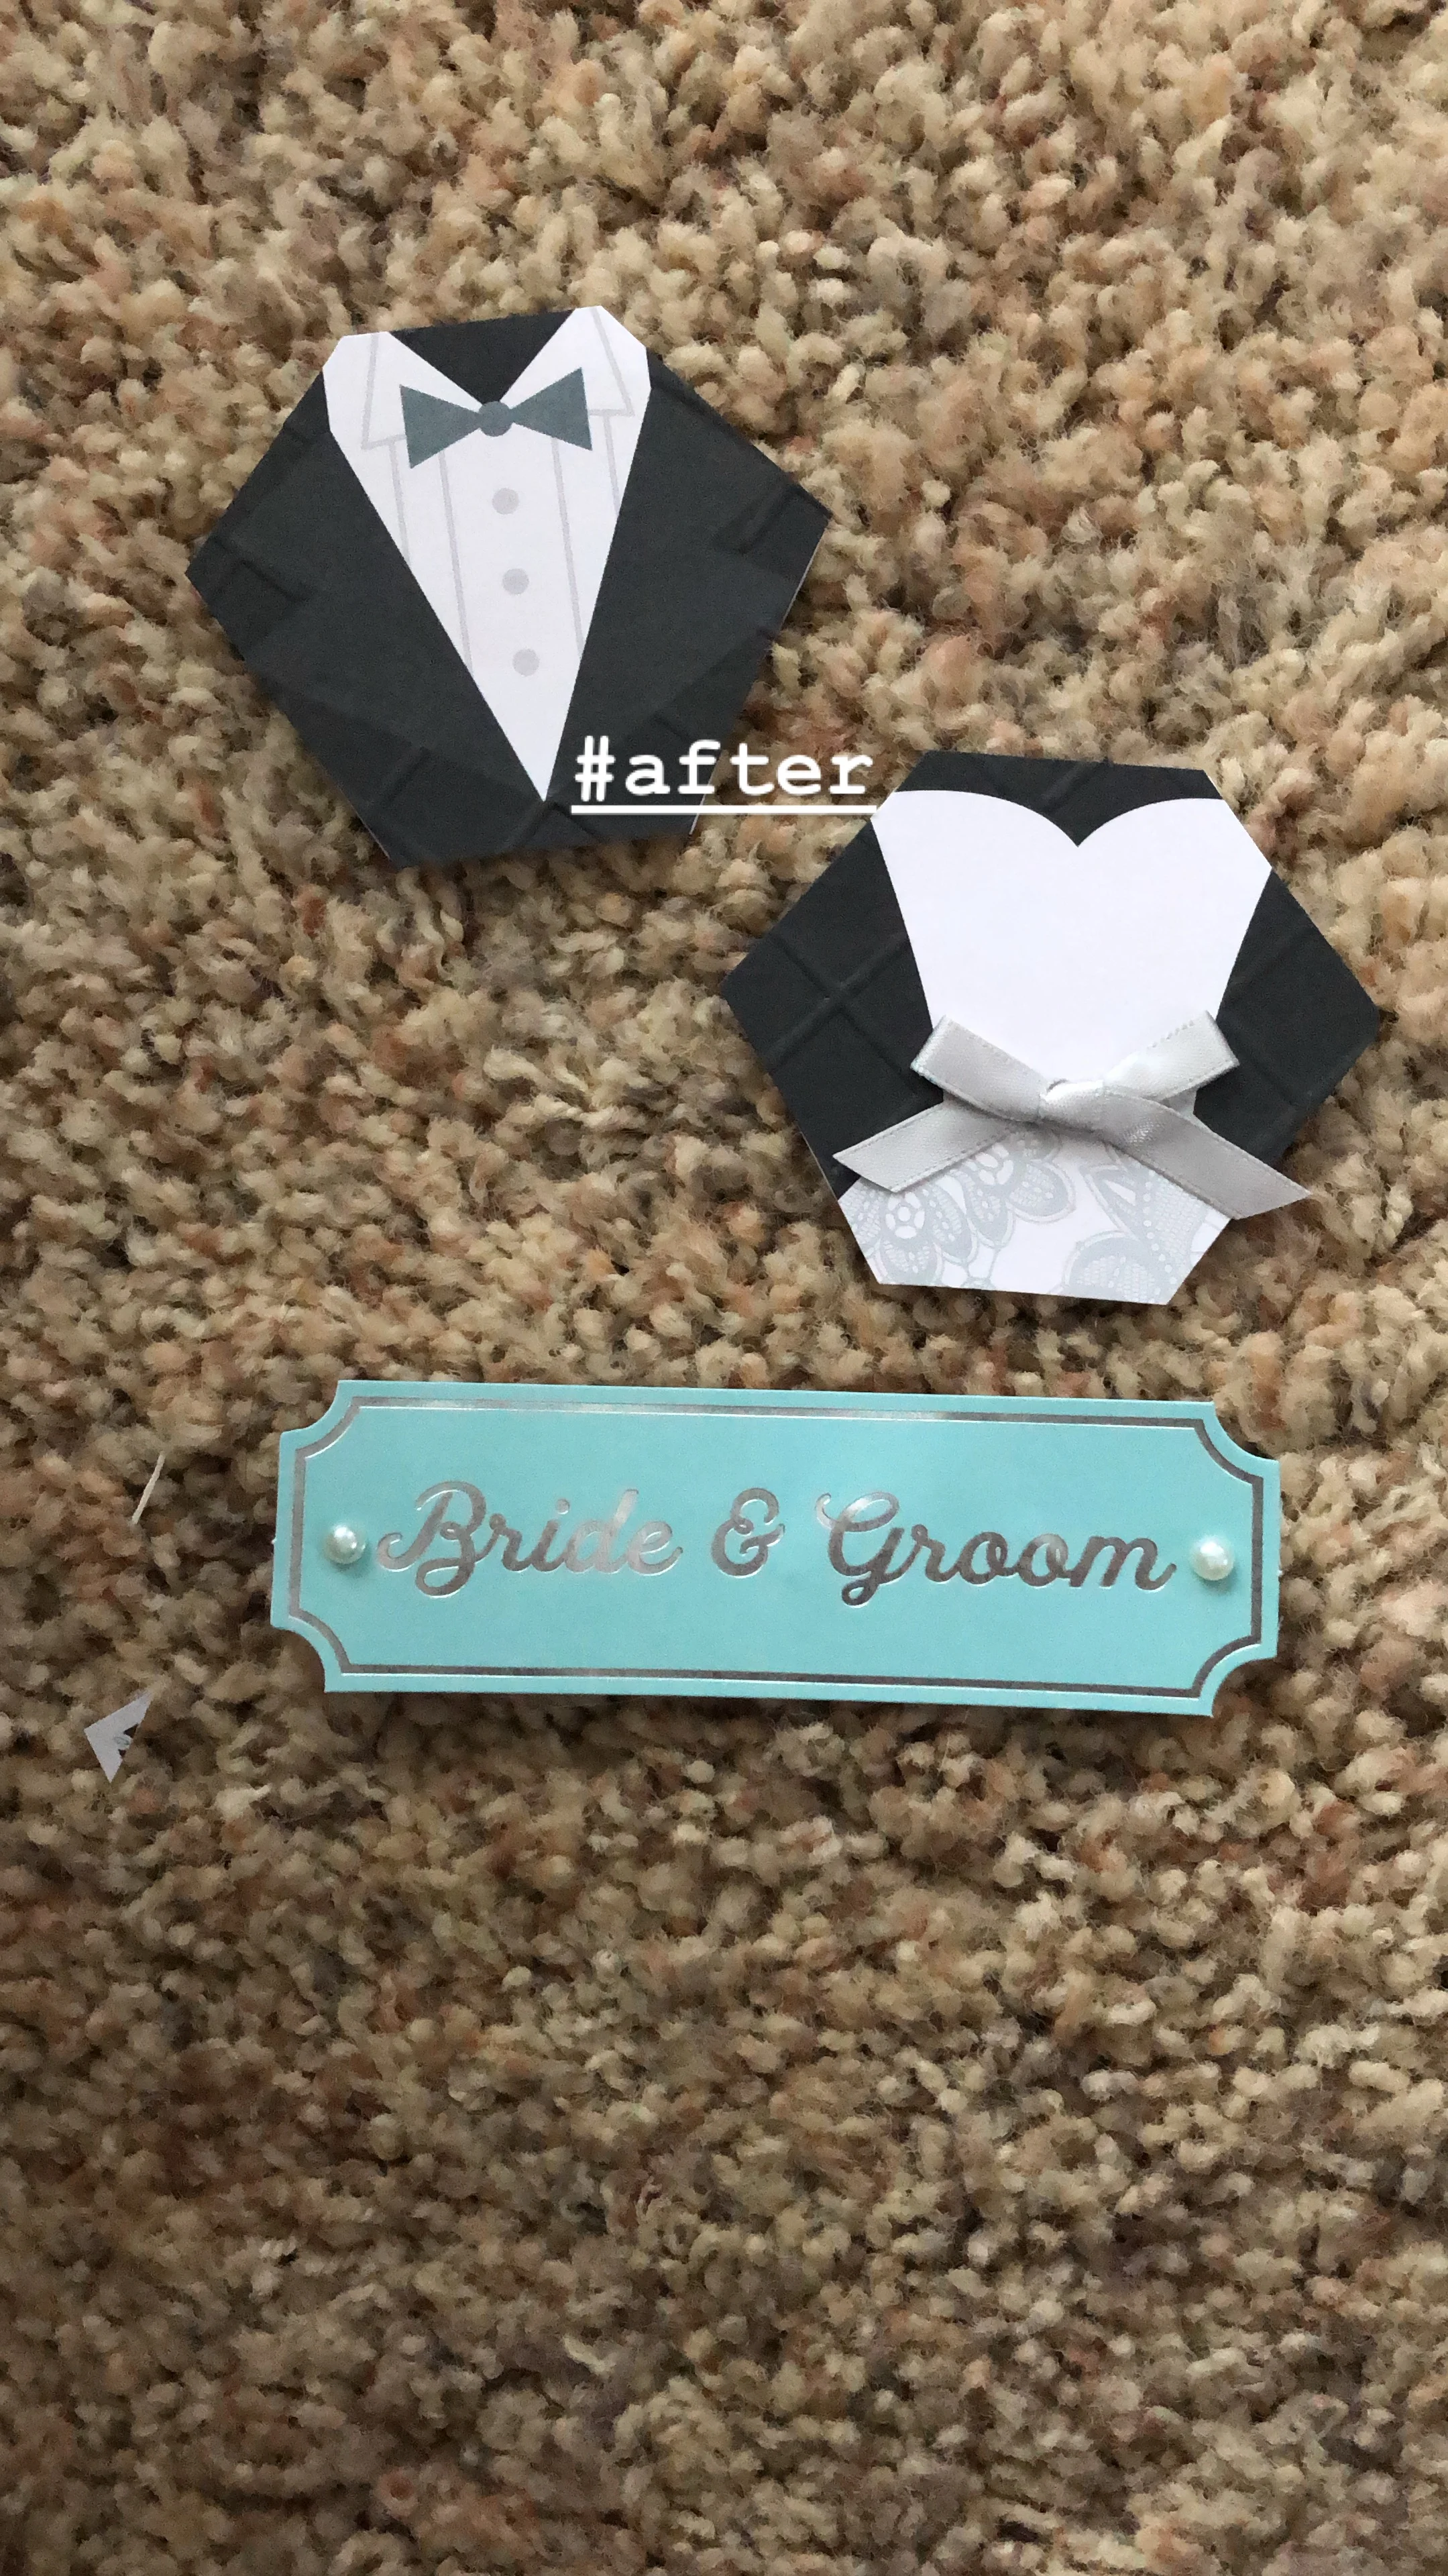
STEP 4: Cut out the shapes, but do one card at a time. I only cut out the front and the inside one card at a time so I didn’t get them confused. Once both of them are cut, using my crafters tape (or glue stick or rubber cement), I glue them together- on the front of it is the front of the card, and then flipped over so you can still read it, the written words from guests on the back.
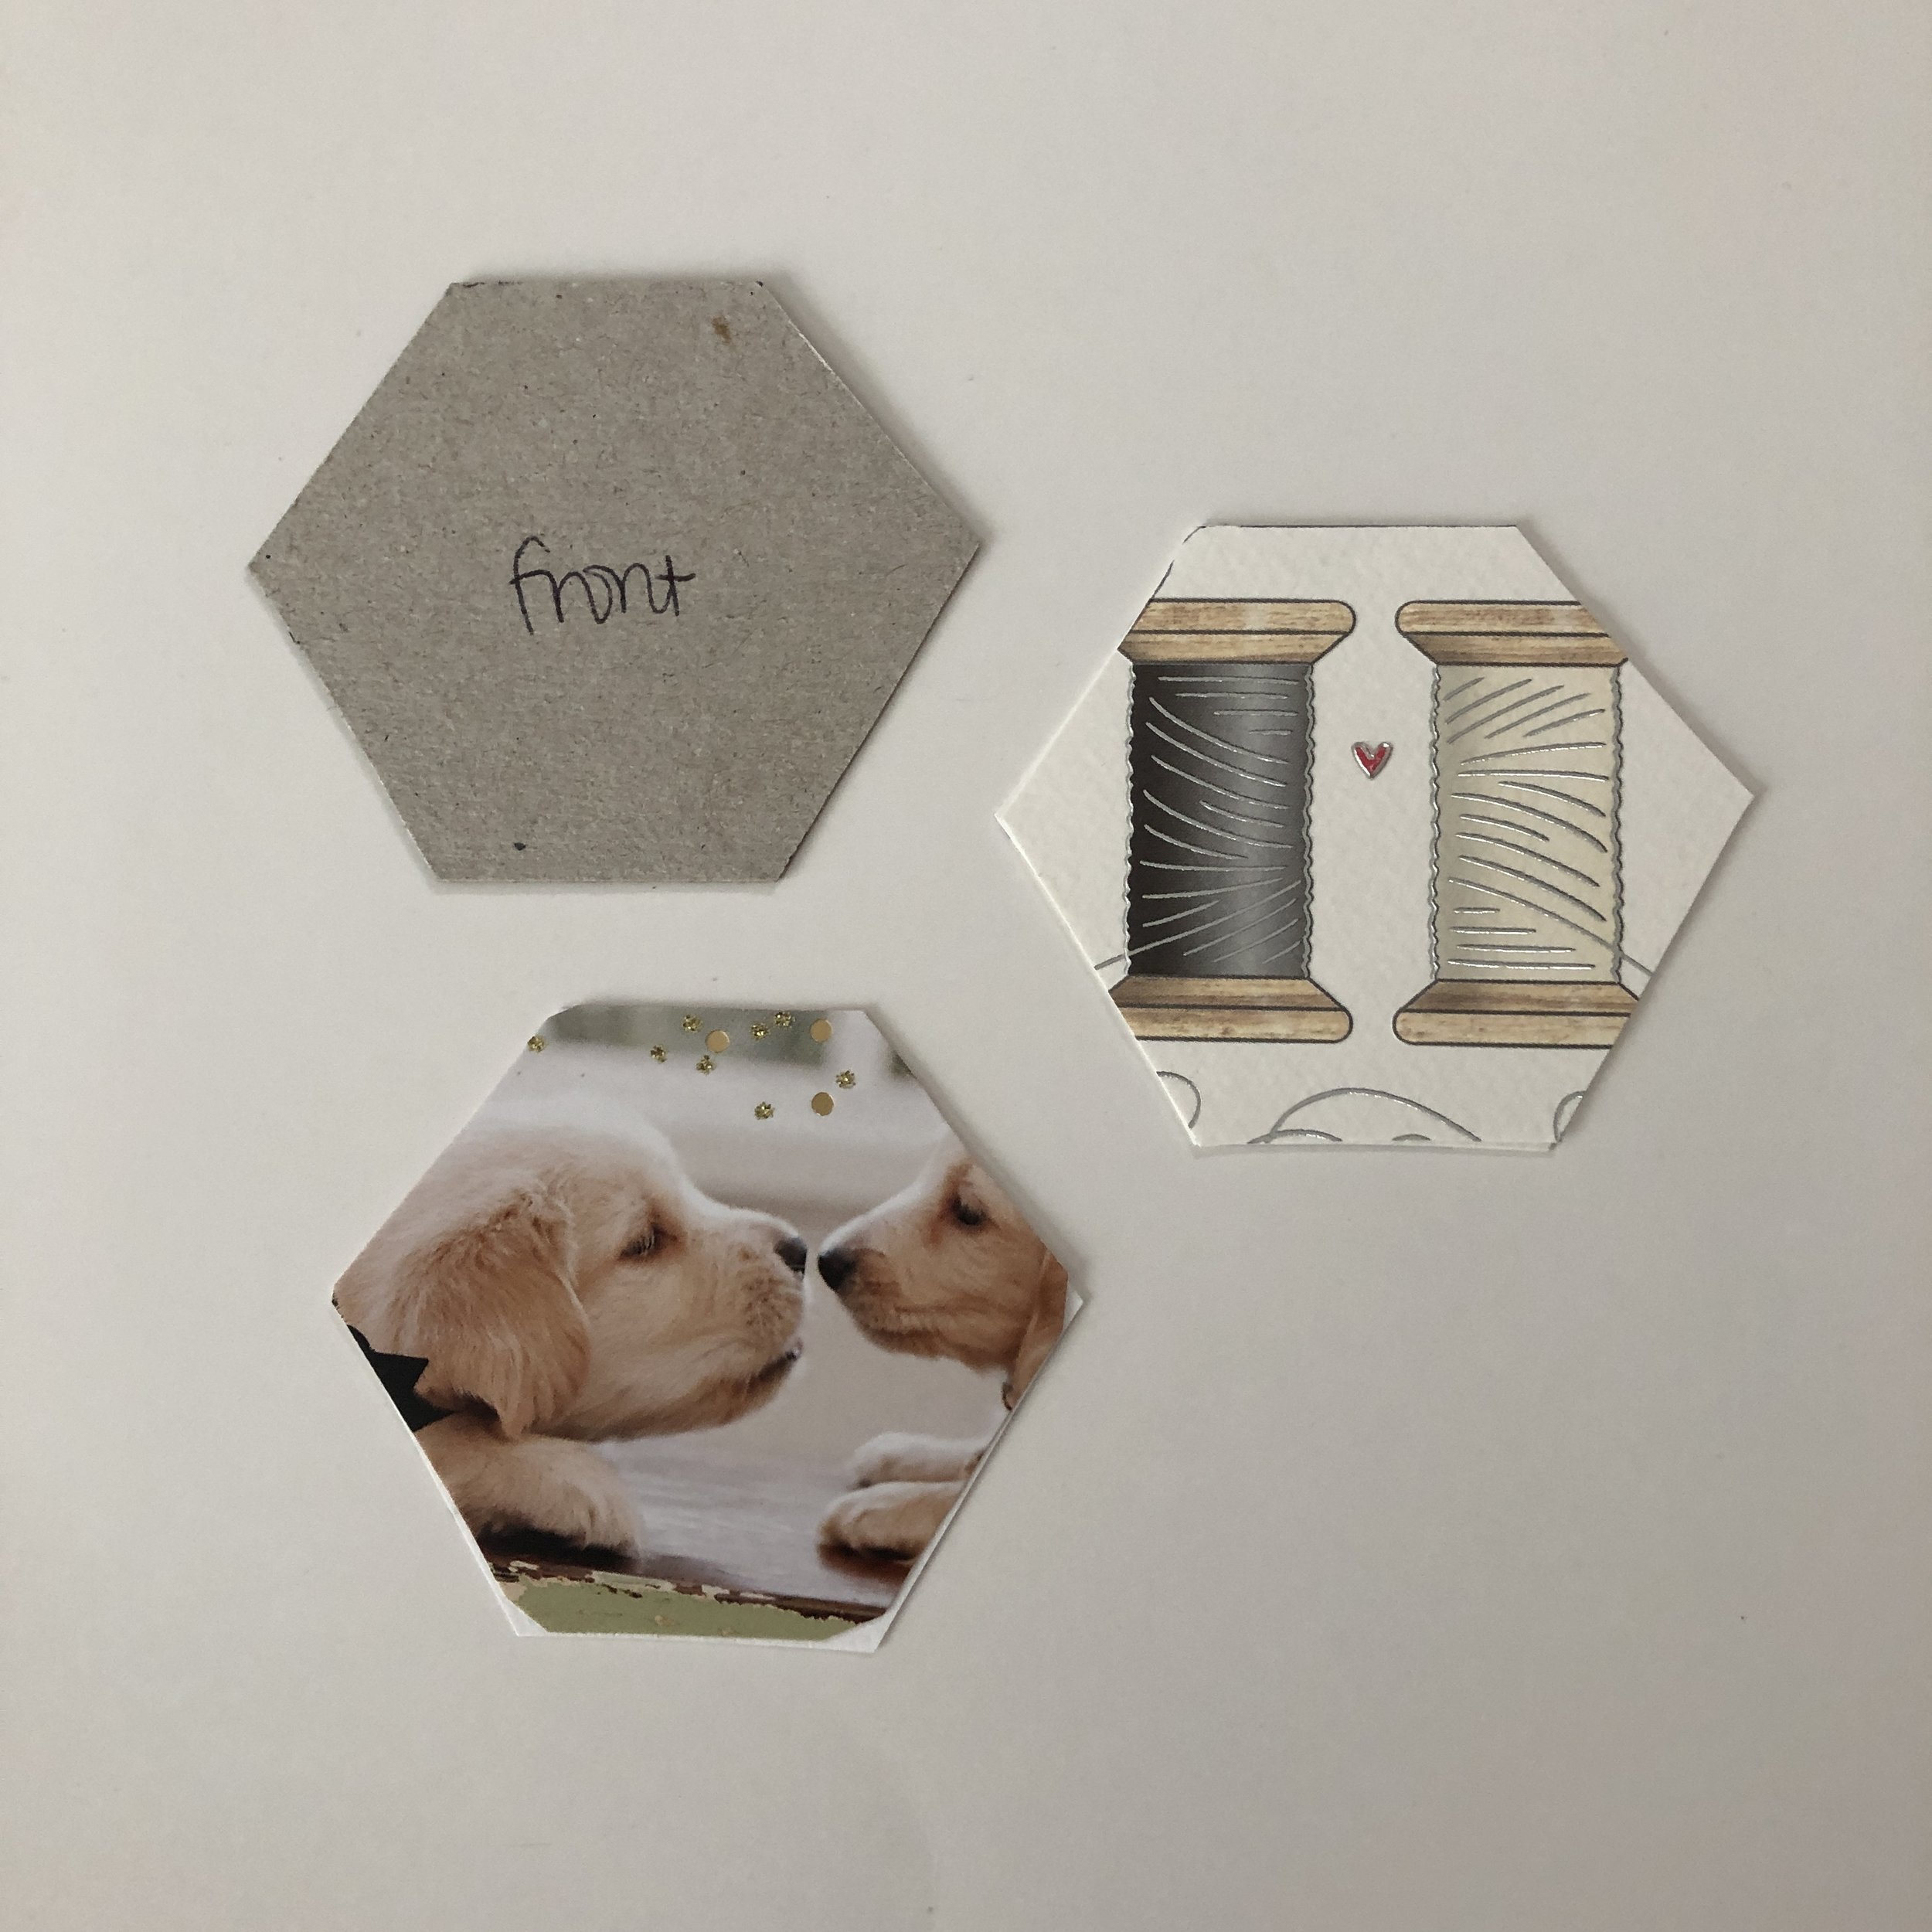
Front of the Card
Inside of the card
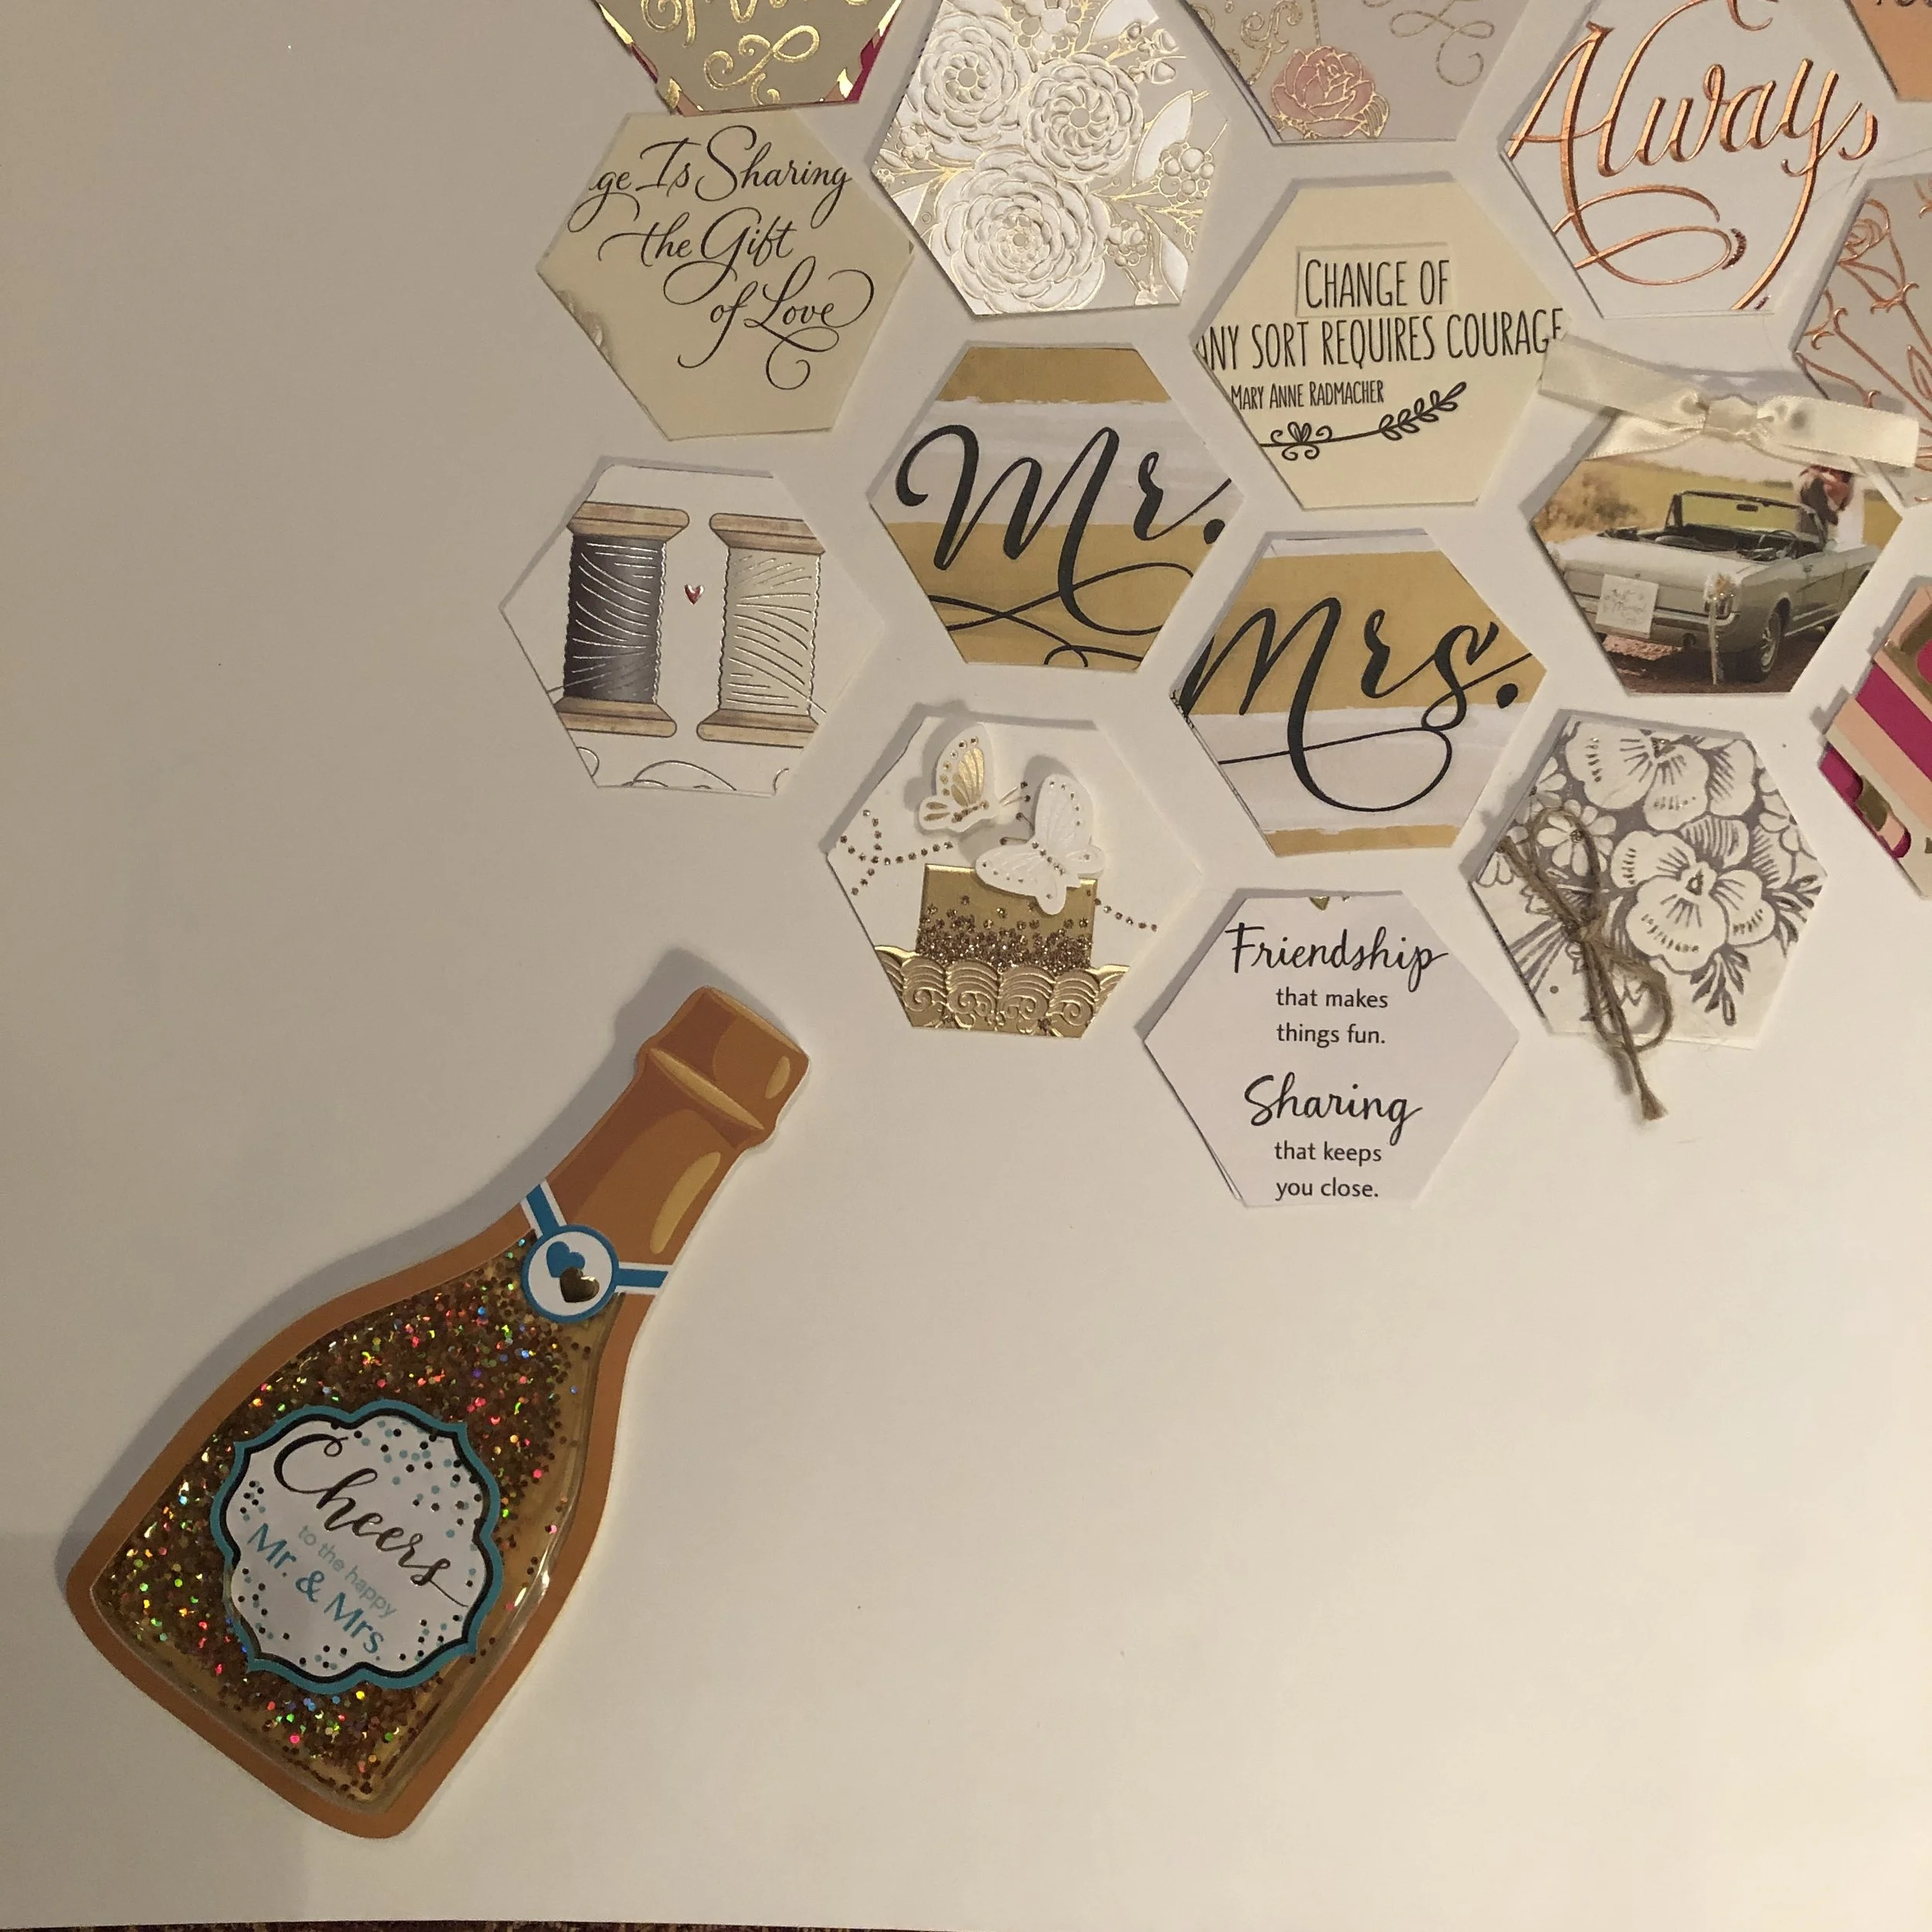
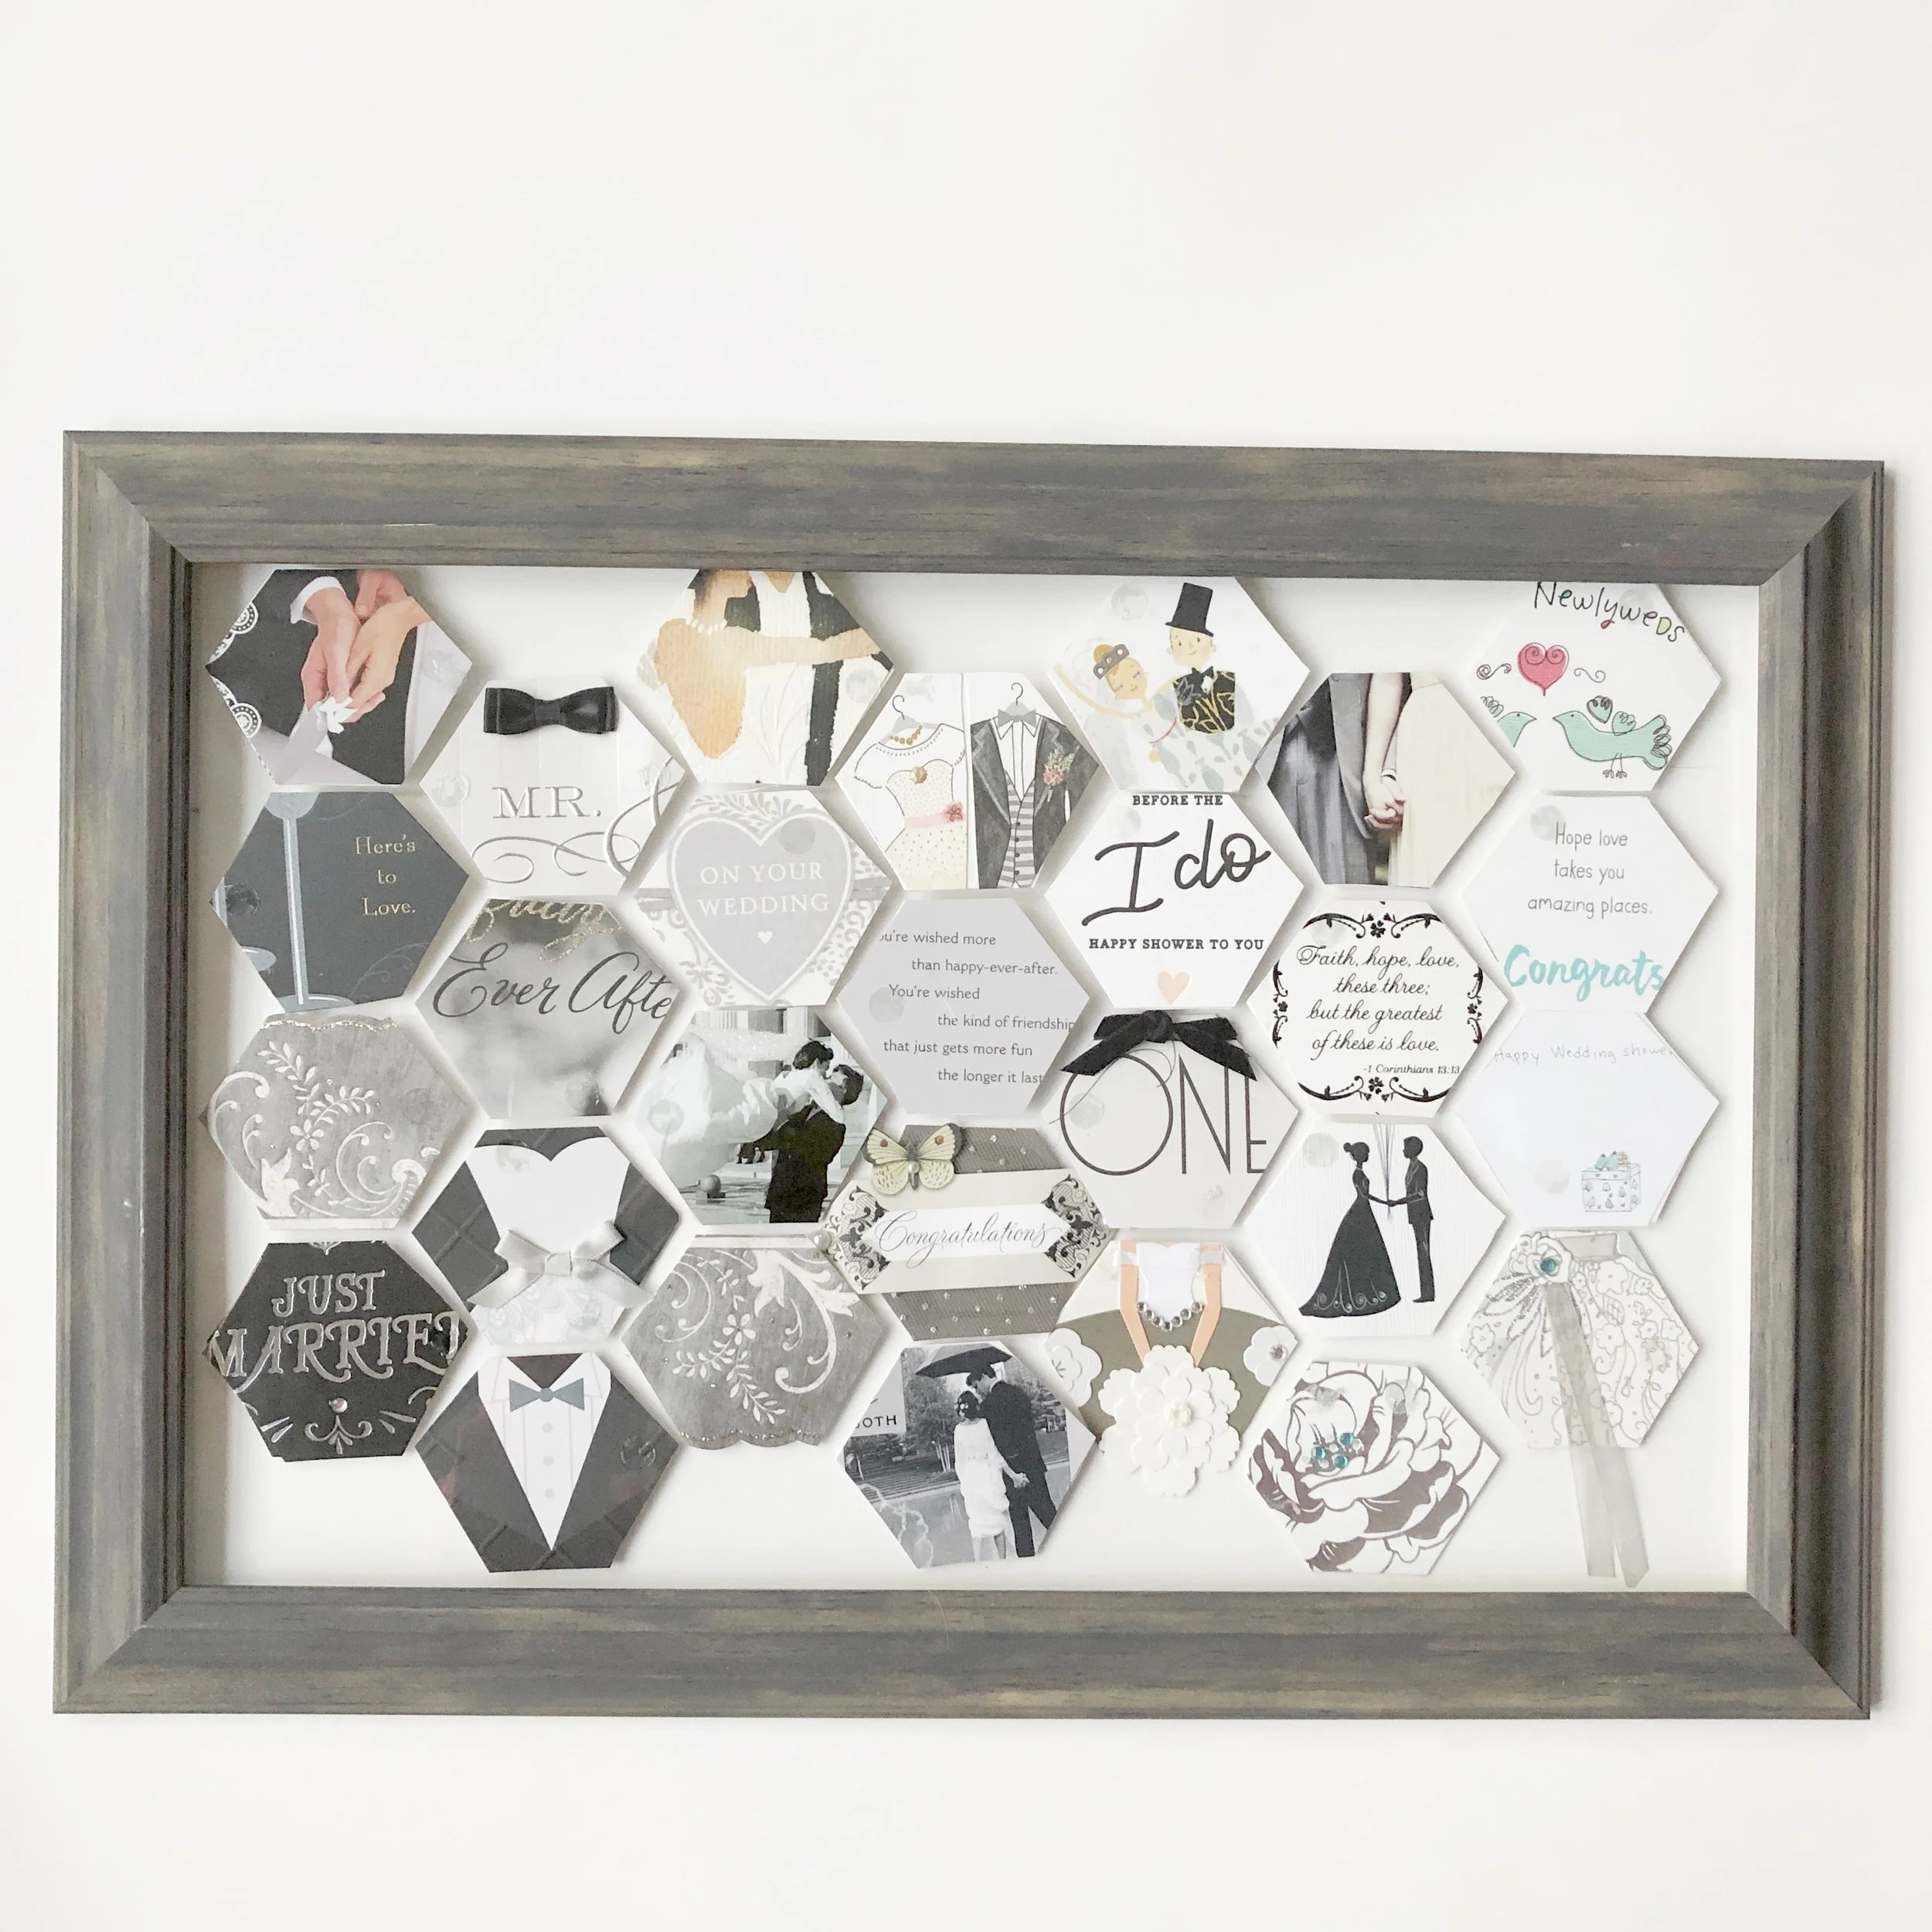
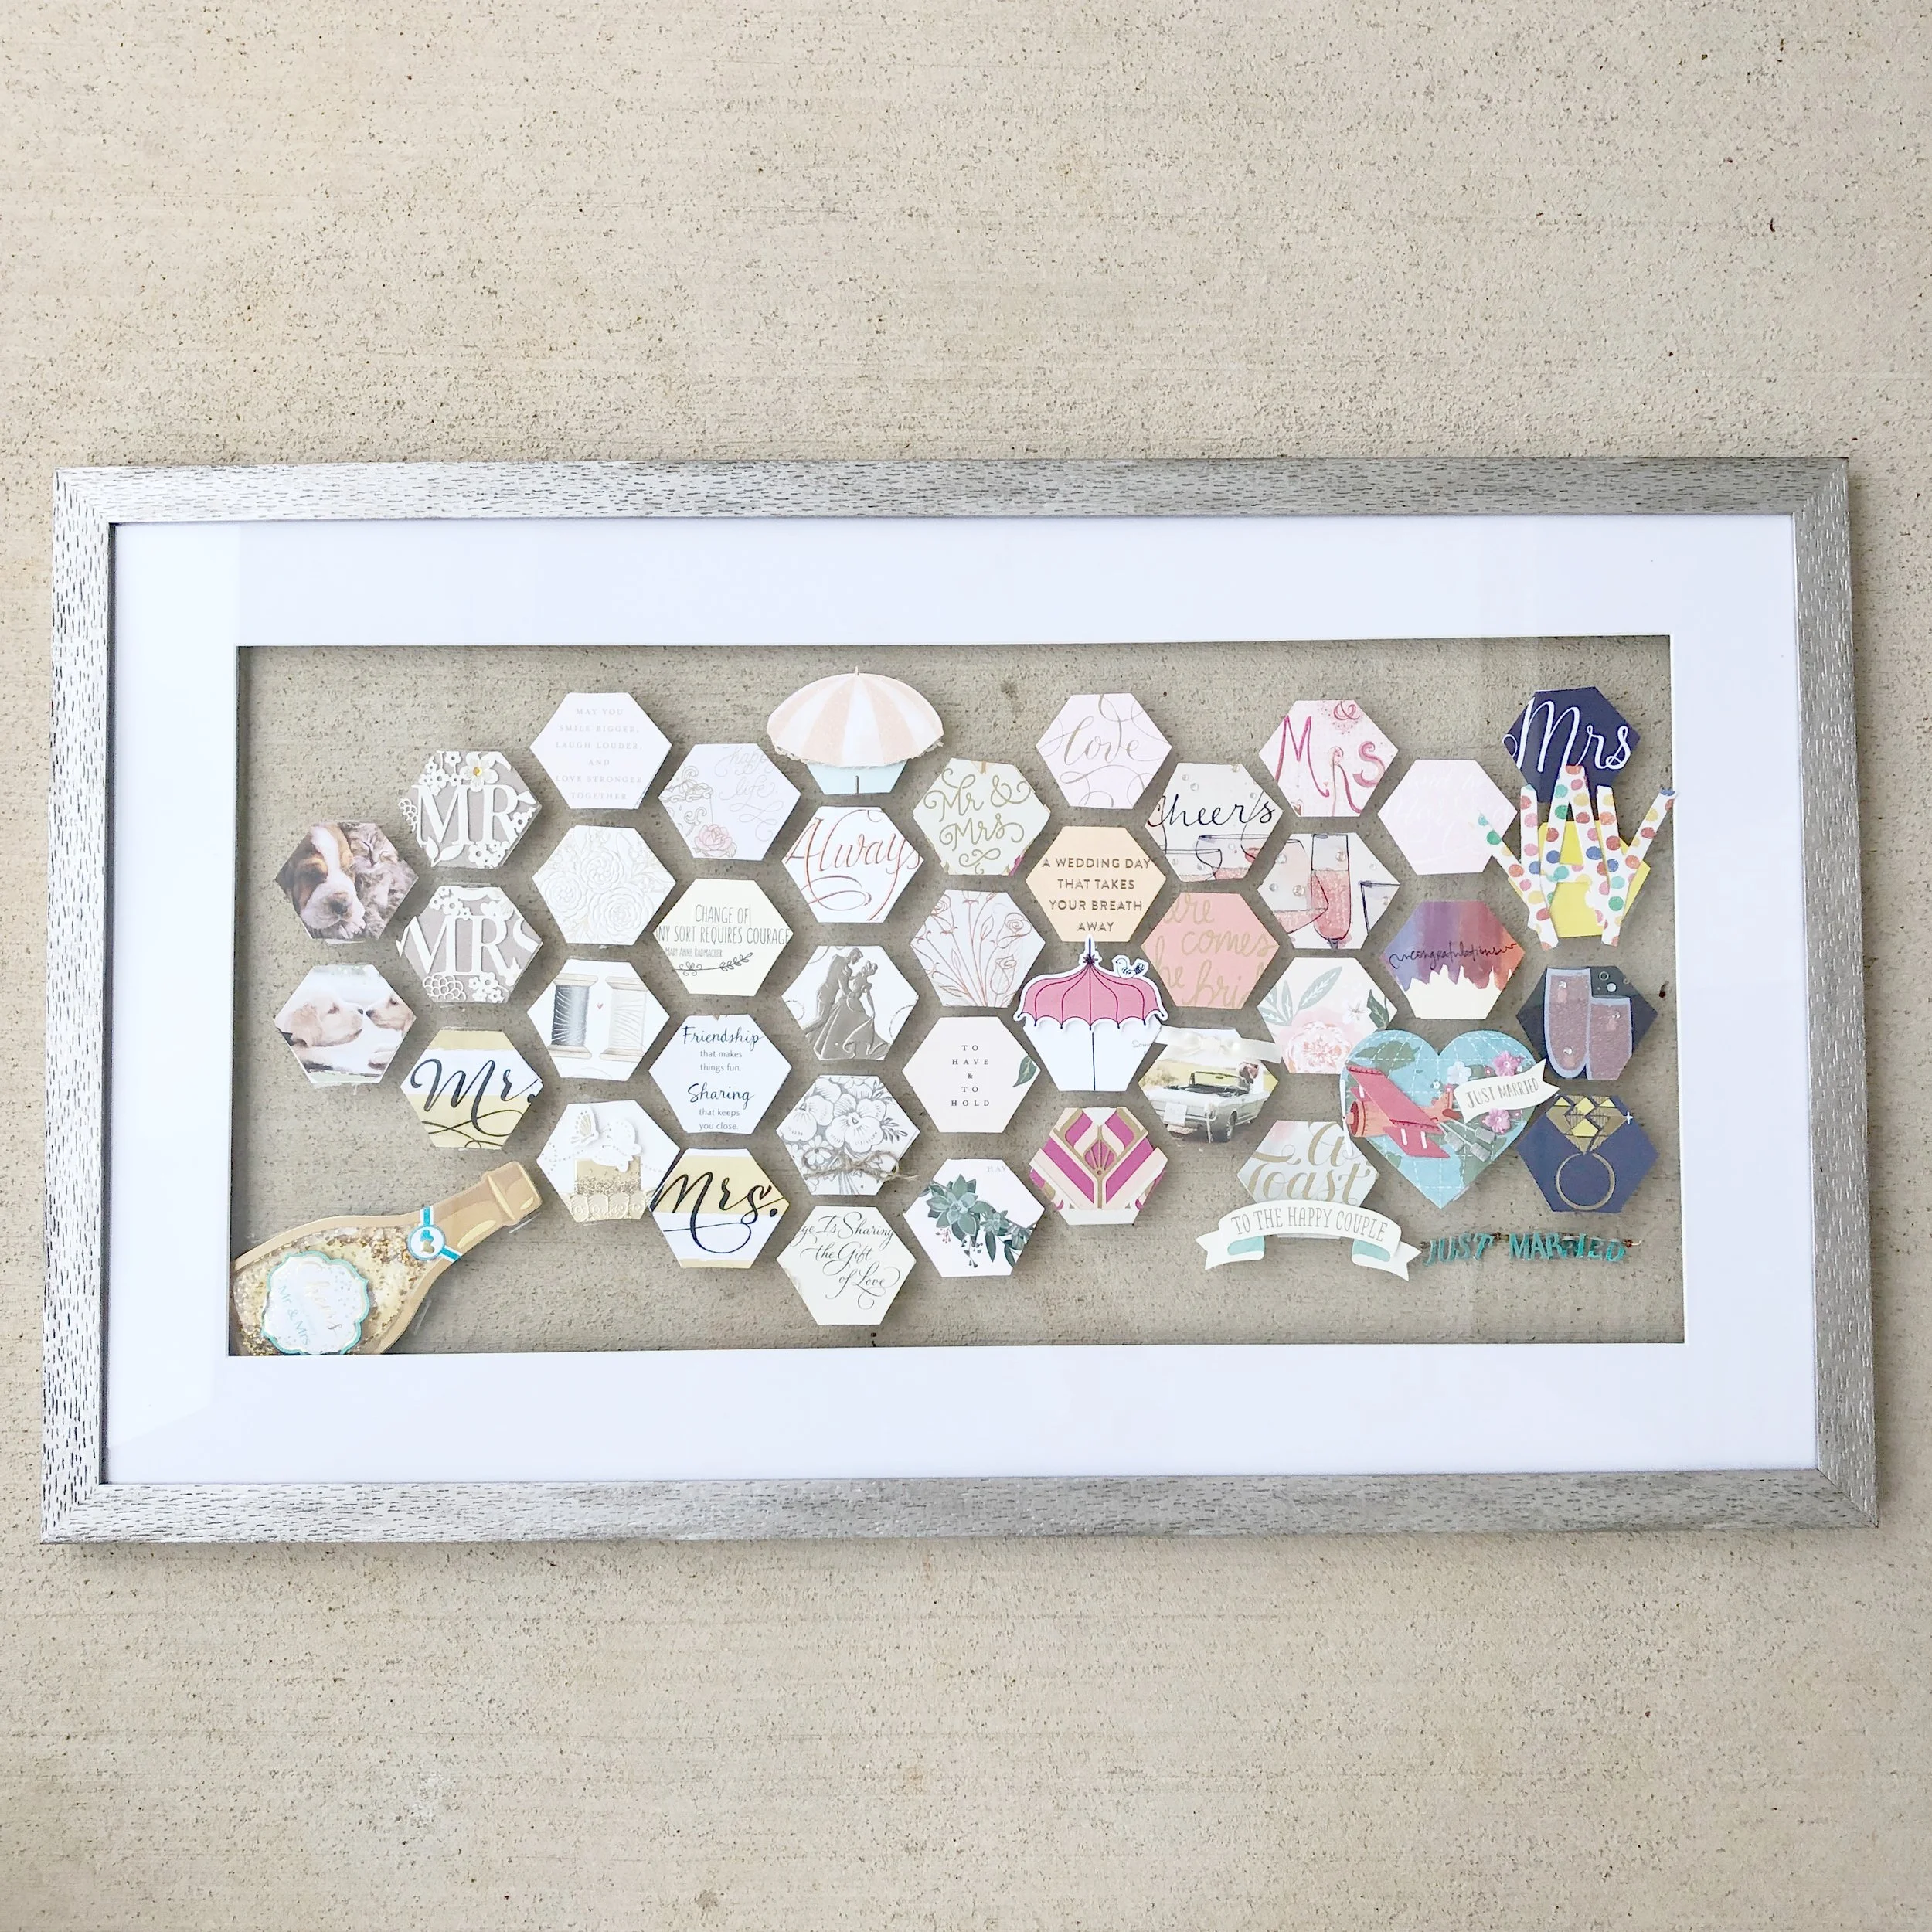
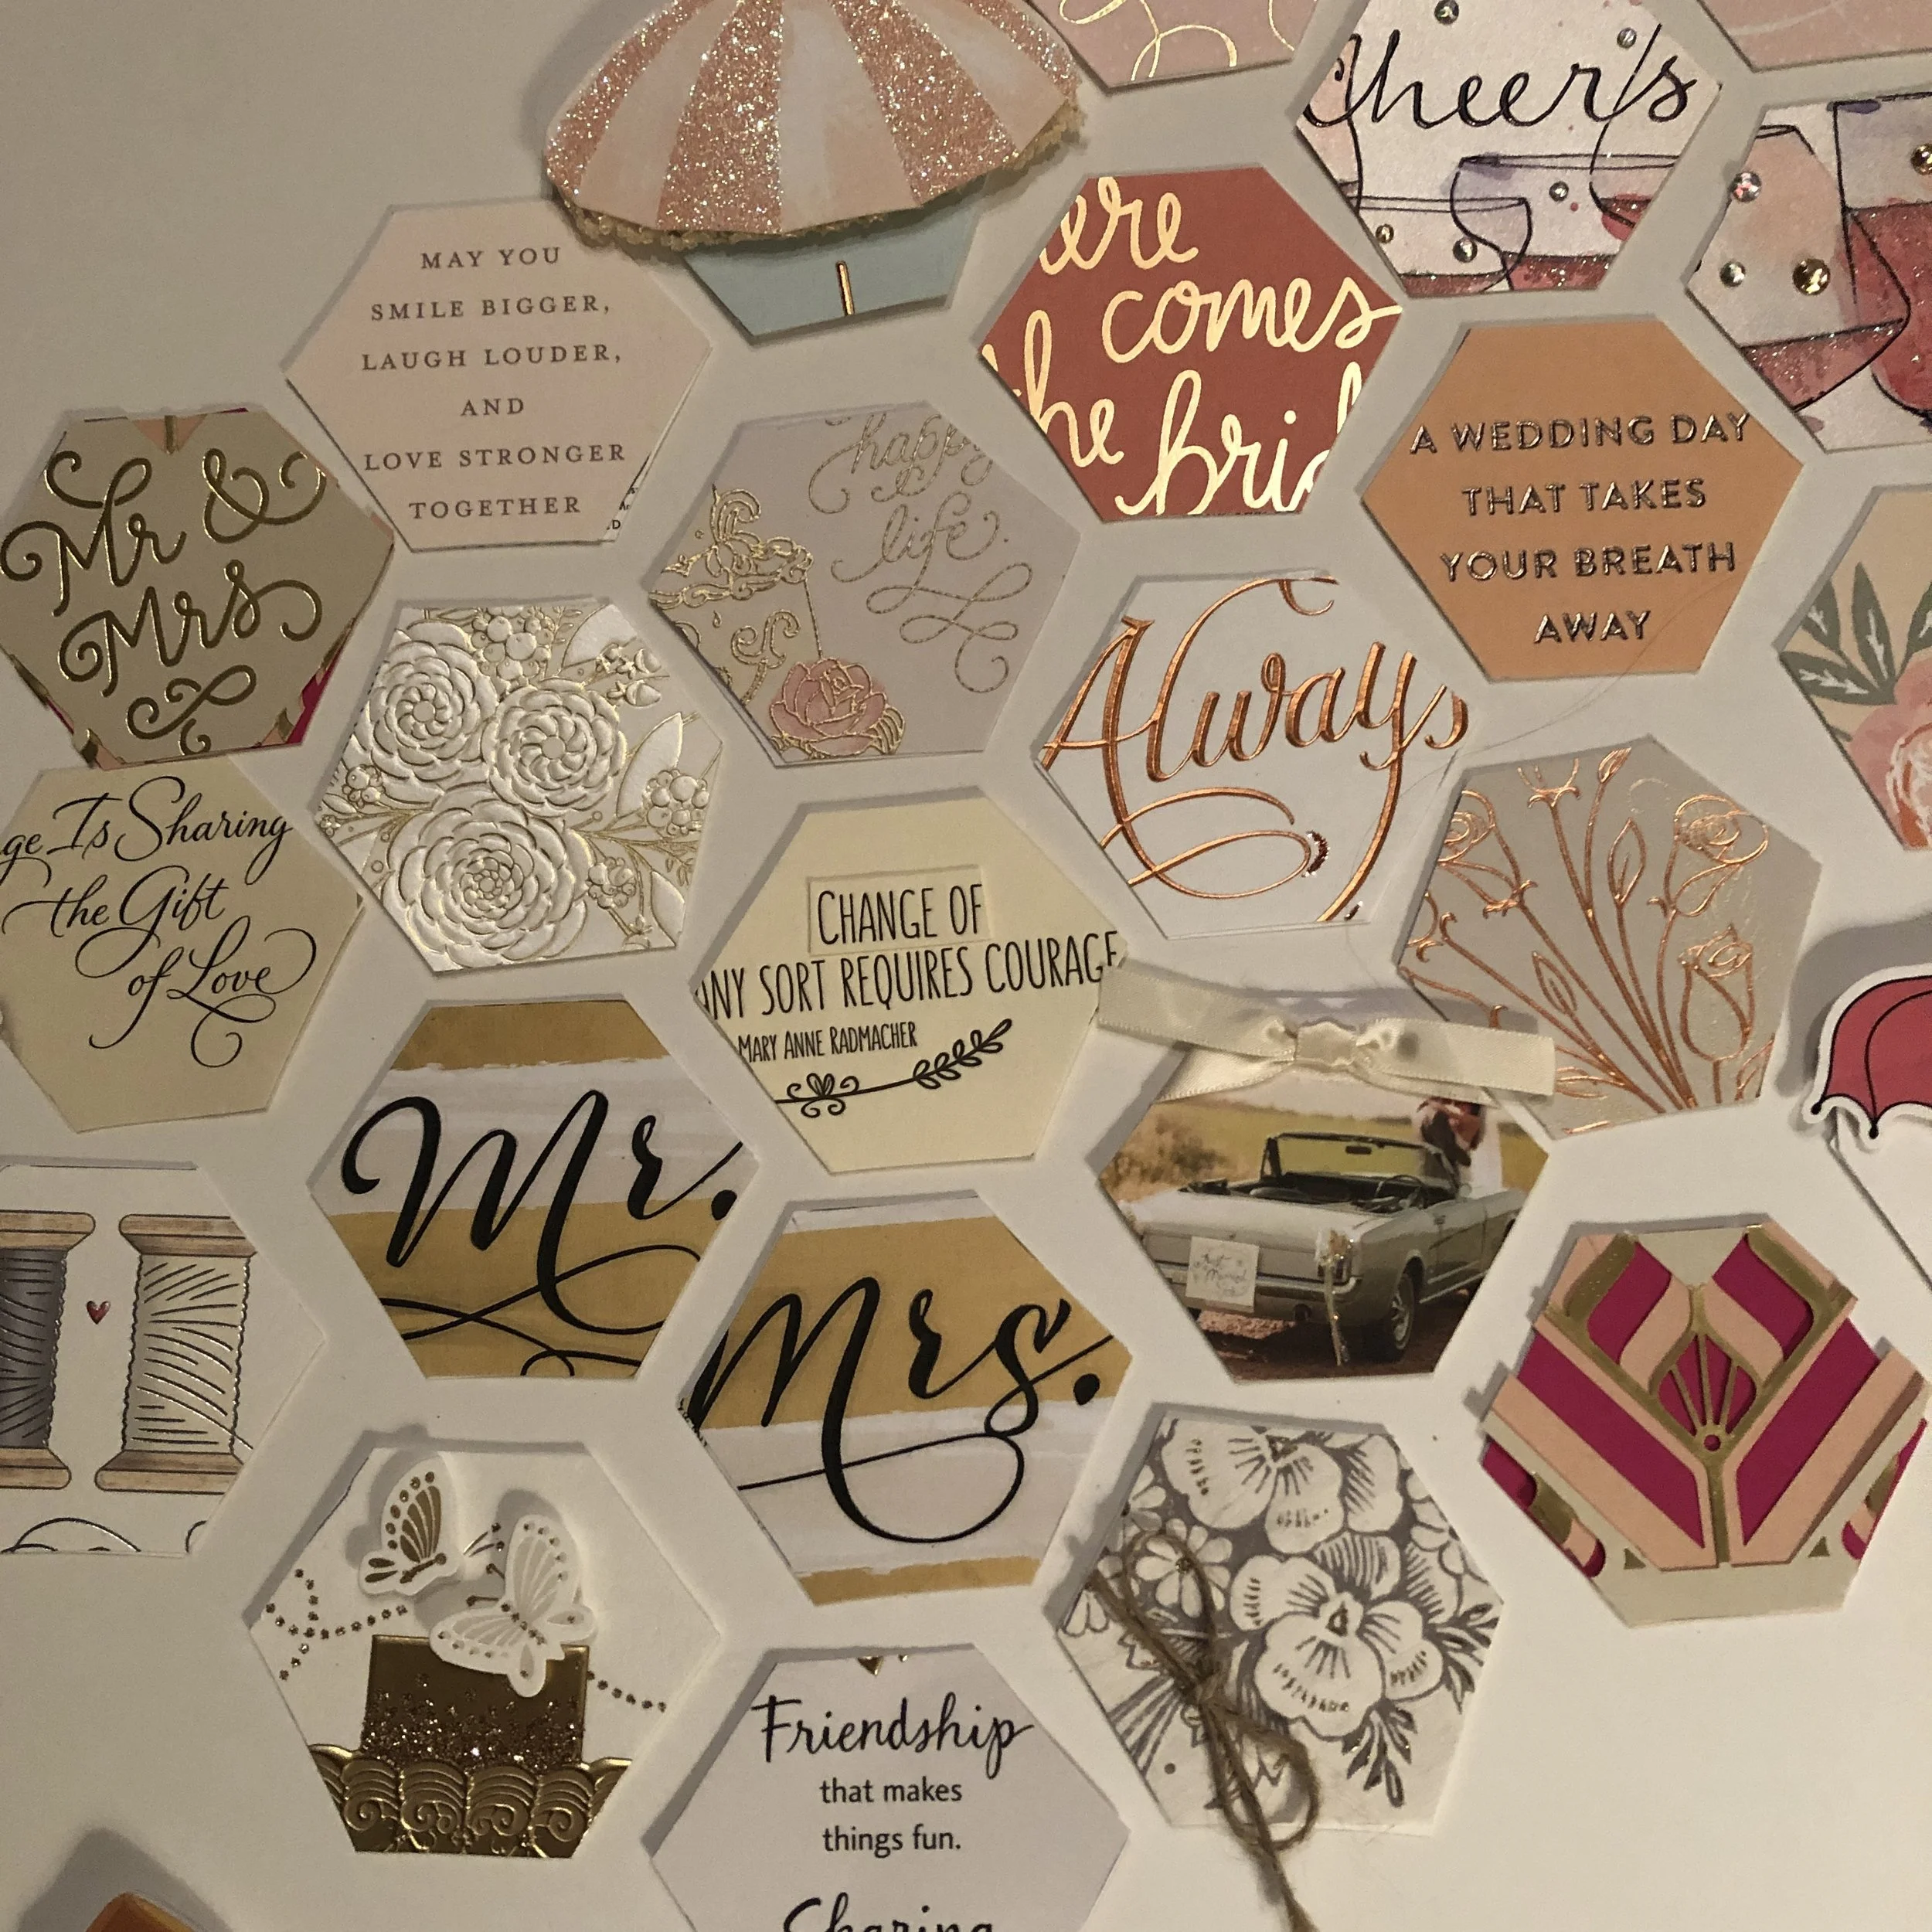
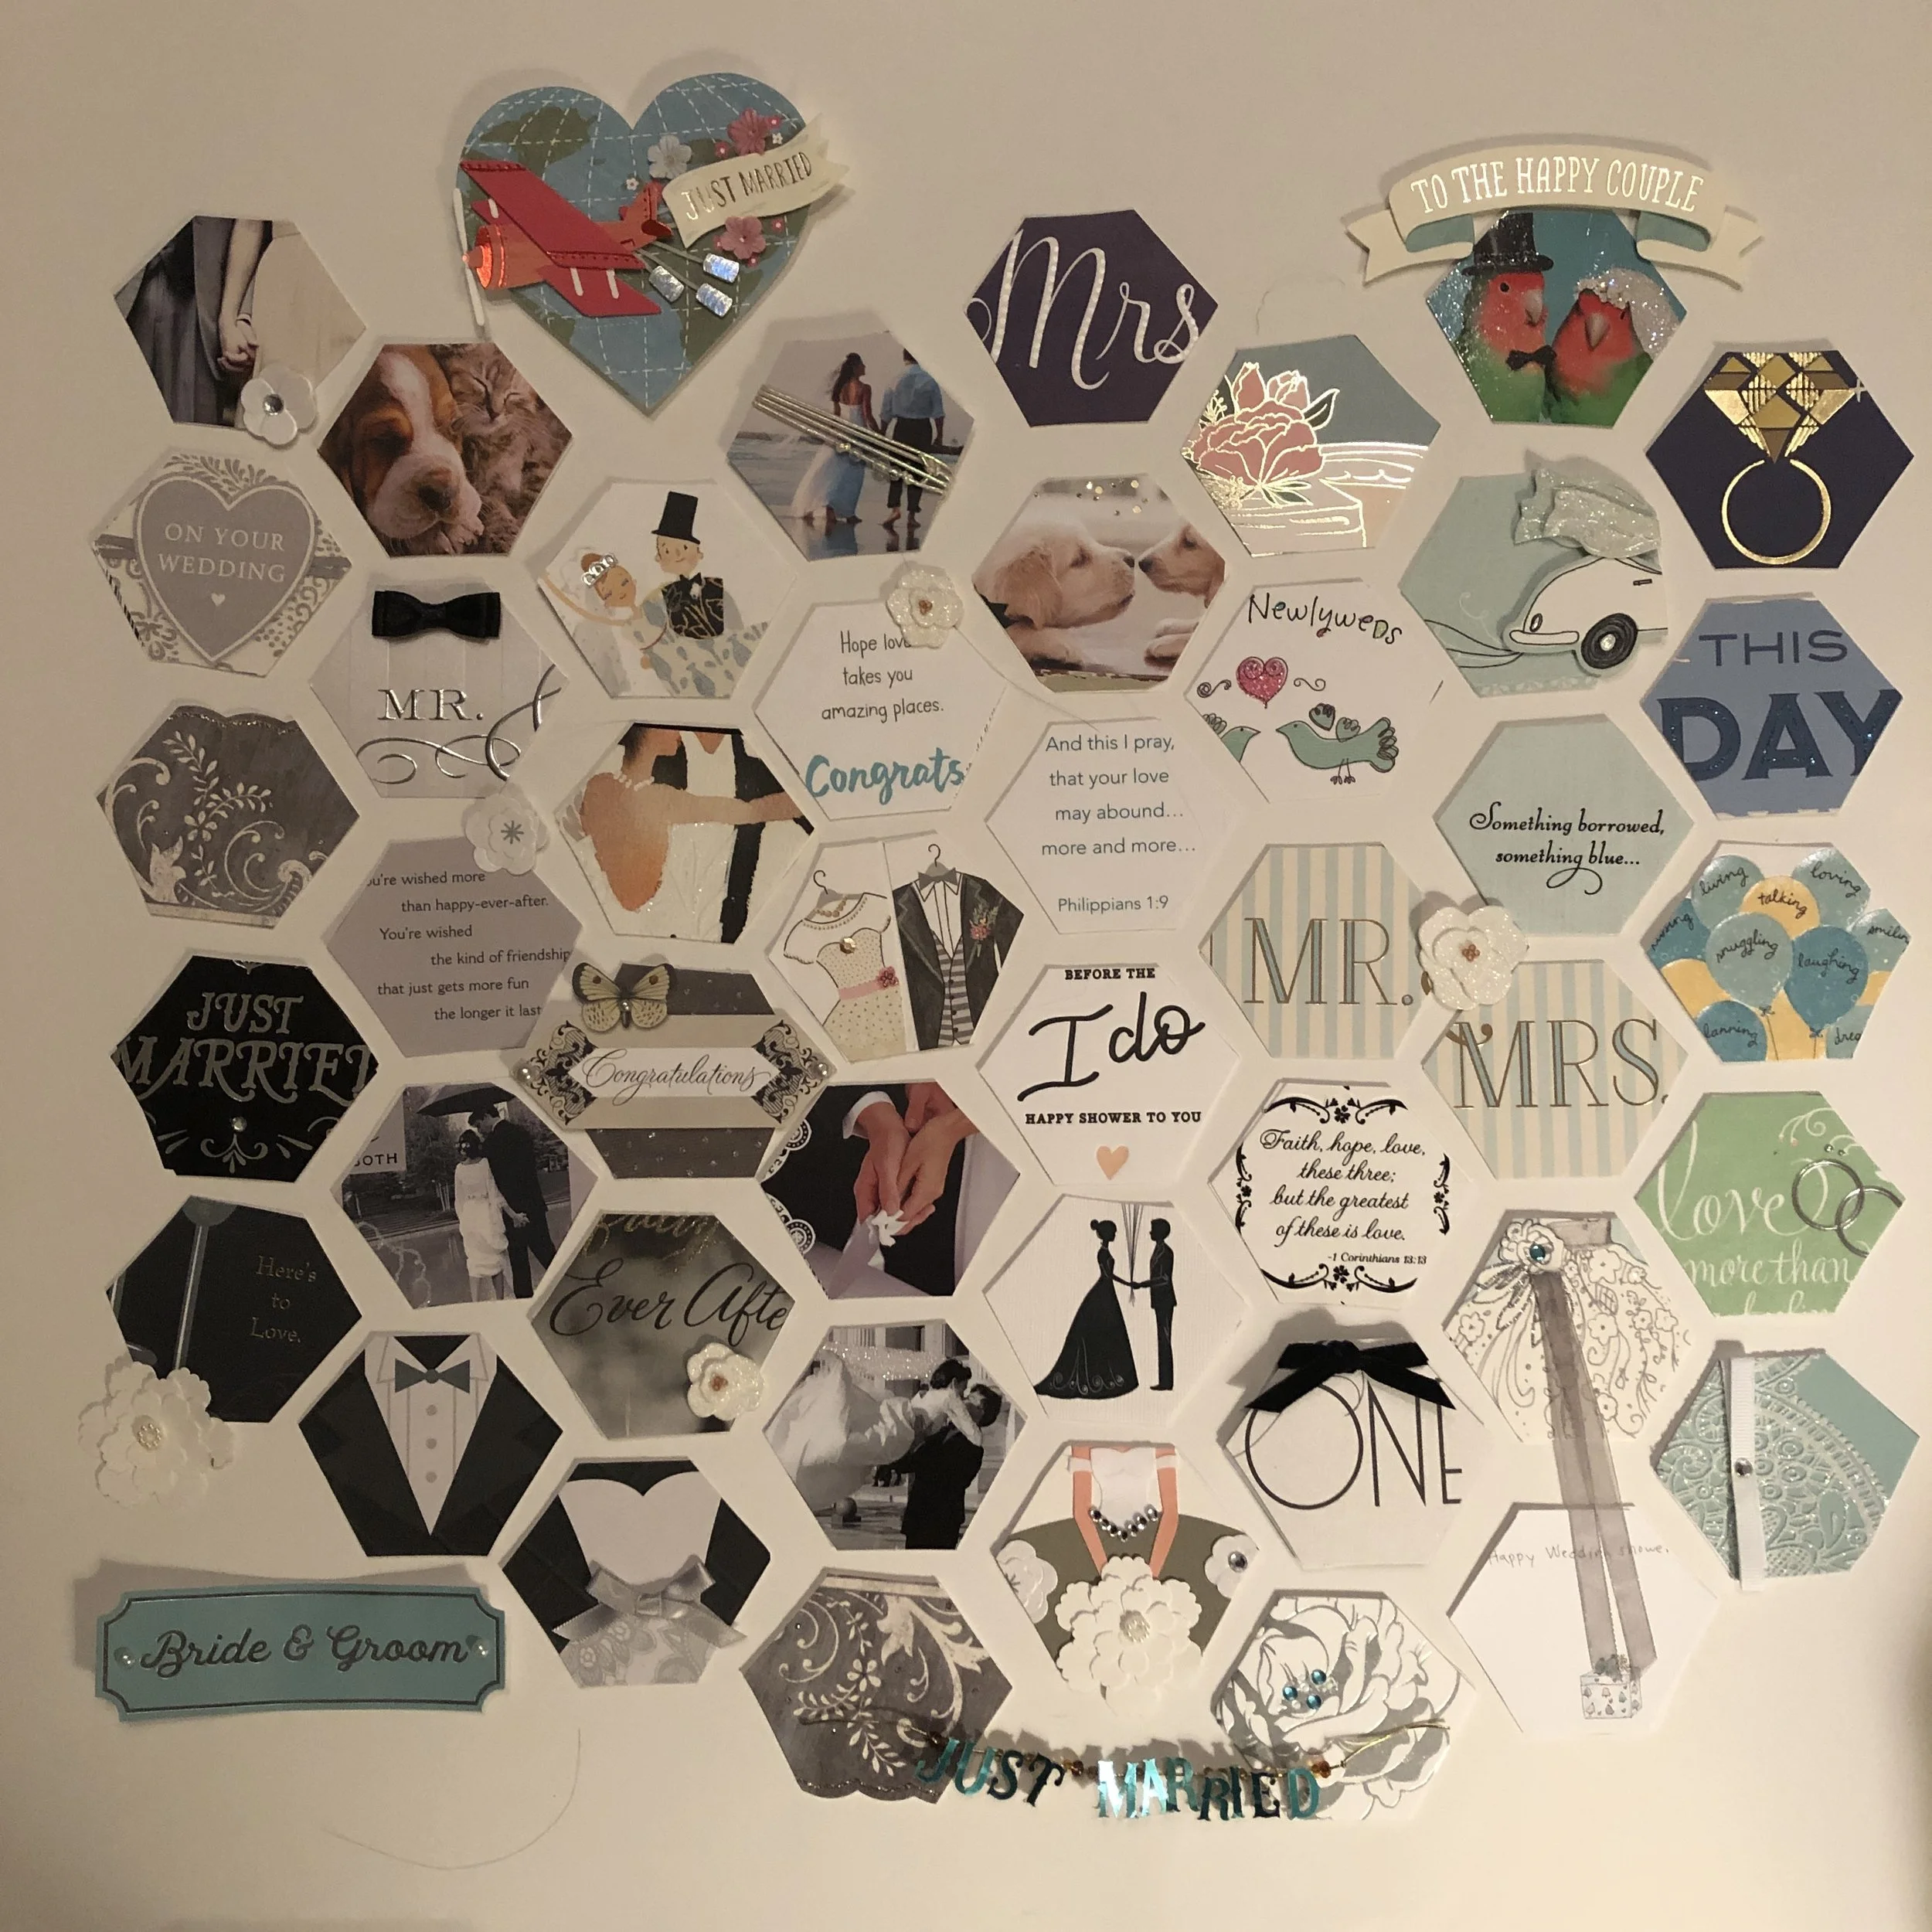
STEP 5: Once all of the cards were cut and glued, I arranged them based on the color and design. One of the cards I got that I really loved was a champagne shaped bottle with glitter and water (or some solution) in it. I couldn’t cut it up, so it inspired me to make it look like a champagne bottle was being popped. And since the champagne card was gold, I used all my white and gold and then added in pink cards. I arranged them by color to give the overall feel a little more rhythm.
I did have extra colors, blacks, greys, blues, so I ended up making a few different frames and grouped like colors together: blacks/greys/silvers and then all the blues. When I hang them, I’ll either go for a gallery wall type thing or I’ll put them in different rooms.
STEP 6: Once it’s arranged, measure the size of how you arranged it, that will determine the size of the frame. I bought a frame based on the arrangement, rather than the other way around. I just went to Hobby Lobby and bought a few options.
STEP 7: Once you have your frames and arrangement, I used the clear tape to tape them to the glass. I used small pieces and taped at the top and bottom.
STEP 8: Add the background of your choice! I am choosing to keep my frames open because I want to be able to see the backs of the cards if I want to, however, you may want to put a backing in there to help hold it in place.
For keeping the frames open, I used my staple gun to hold the glass in. To do this, I place the staple gun about a quarter of an inch away from where i wanted the staple to go, shooting the staple into the frame and then it would stick out about a quarter of an inch, therefor holding the glass in place. You could also use a small nail; just make sure you leave the nail head out enough to hold the glass in.
STEP 9: (I have yet to do this myself yet, but….) Hang them! You’re all done! Now, rather than having a random box of cards that will just sit there, you have a beautiful reminder of an amazing time in your life.