
How To: Make It Sparkle

Happy Friday! I can't believe another week has come and gone...or another issue of Twila! Especially as our last one. I have to say, we certainly went out with a bang! I loved see our photos all over Facebook and Instagram and seeing so many positive comments and shares. Thank you so much. It means so much to see how much everyone enjoys it. It makes all the time and effort worth it. If you have seen it yet, click on over to it now and check it out! It's a worth a few minutes of your time (in my opinion! :) ).
Anyways, to complete our week of Twila Magazine themed blogs, I have a little do-it-yourself today. I kept seeing those glittered wine and champagne bottles all over Pinterest and decided to give it a try for the photoshoot because they look AWESOME. I will definitely being using this trick again as they make a great gift. And I have to say, by adding a clear gloss over the glitter, I was surprised by how little the glitter got everywhere. It really didn't at all! So that was a huge plus.
I enlisted my good friend, Jennifer, to help me by bribing her with wine and girl talk. So we had a really fun time making these and she was a spectacular sport about working with glitter. AND a huge thank you to Minh (our amazing photographer from Instant de vie Photography) who captured some amazing photos at the photoshoot so you're not relying solely on my terrible how-to photos from my iPhone.
Moving on to the how-to portion of this blog!

Mod Podge
Clear Gloss Spray
Glitter (any color!)
Brush
Painters Tape
Any glass bottle empty or full (wine, champagne, liquor, coke) we used the mini wine bottles
Paper to cover your crafting space

Step 1: Remove the wine labels!
And pour a glass for yourself. Anytime glitter is involved, wine is key to not getting upset about how much glitter you have EVERYWHERE. Also, place the blue painters tape wherever you'd like to create a nice line or wherever you don't want to get glitter. We wanted to add bows to our bottles, so we left the top part un-glittered.
Note: If you want to add any type of sticker or label to your bottle, DO NOT put it ON TOP of the glitter. Make space for it before, or it will not stick to the glitter and look nice. Make the shape of the sticker or label out of tape and work around it.

So I totally forgot to take a picture of this step. I'm sorry. Between the girl talk and wine, I missed my opportunity. But, it's pretty easy. Taking your brush, mod podge the crap out of that wine bottle. DON'T SKIMP. Or you will be going back over it later. I mean, really lay it on there pretty thick. You want the glitter to stick well.

Yay! It's glitter time. While the mod podge is still wet, pour the glitter over it. This is when an old newspaper or paper for your space come in handy. It catches all the glitter AND you can pour the unused glitter back into the bottle of glitter.
Side note: It took me a RIDICULOUS amount of time and places to find glitter. I went to 4 places before resorting to Wal-mart to find gold glitter. Either it came in a 10 pack of many colors for a ridiculous price or they didn't have any. So, Don't waste your time skip all the other places and just go straight to Wal-mart for these supplies. Plus, their mod podge is cheaper than the craft stores. Just a suggestion.
After this dries a little bit, give the bottle a little shake to get any unstuck glitter off. If you see any spots that are lighter than other, paint a little more mod podge there and add some more glitter.
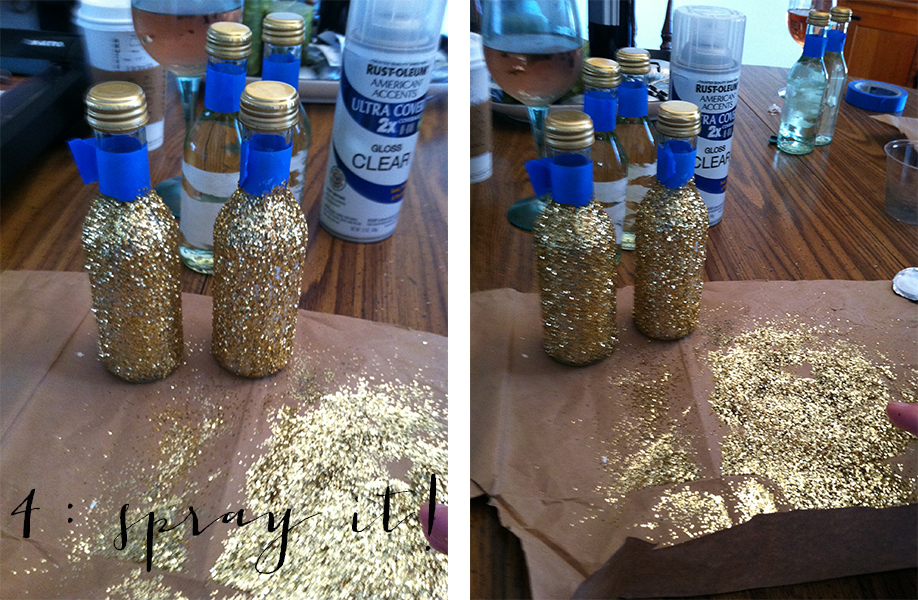
Lastly, spray it! I took mine outside and sprayed it over some newspaper so the smell wasn't in the house (The Mod Podge fumes were already getting to me).
Once it's all dry, take the tape off and add your labels or ribbons or whatever you'd like for the final touches.

There looked amazing in our photoshoot! They were just such a fun touch of sparkle.
They make great gifts and decorations! Everyone who helped with our photoshoot got to take one home, and I still have one in my office as decoration.
Thanks so much again for the wonderful support and feedback this week on the magazine! It was just amazing and I am so blessed to have worked with such amazing people.
Have an amazing weekend! See you on Monday!
